Deploying Front-End Apps To The Amazon Cloud

I am a software Engineer with 5 years of experience in Frontend development with specialisation in Vue.js, JavaScript, React & Typescript. I enjoy going on tours and meeting new people
Learn how to push your front-end code to the cloud, by following all the steps carefully set out in this article.
Session Replay for Developers
Uncover frustrations, understand bugs and fix slowdowns like never before with OpenReplay — an open-source session replay suite for developers. It can be self-hosted in minutes, giving you complete control over your customer data.

Happy debugging! Try using OpenReplay today.
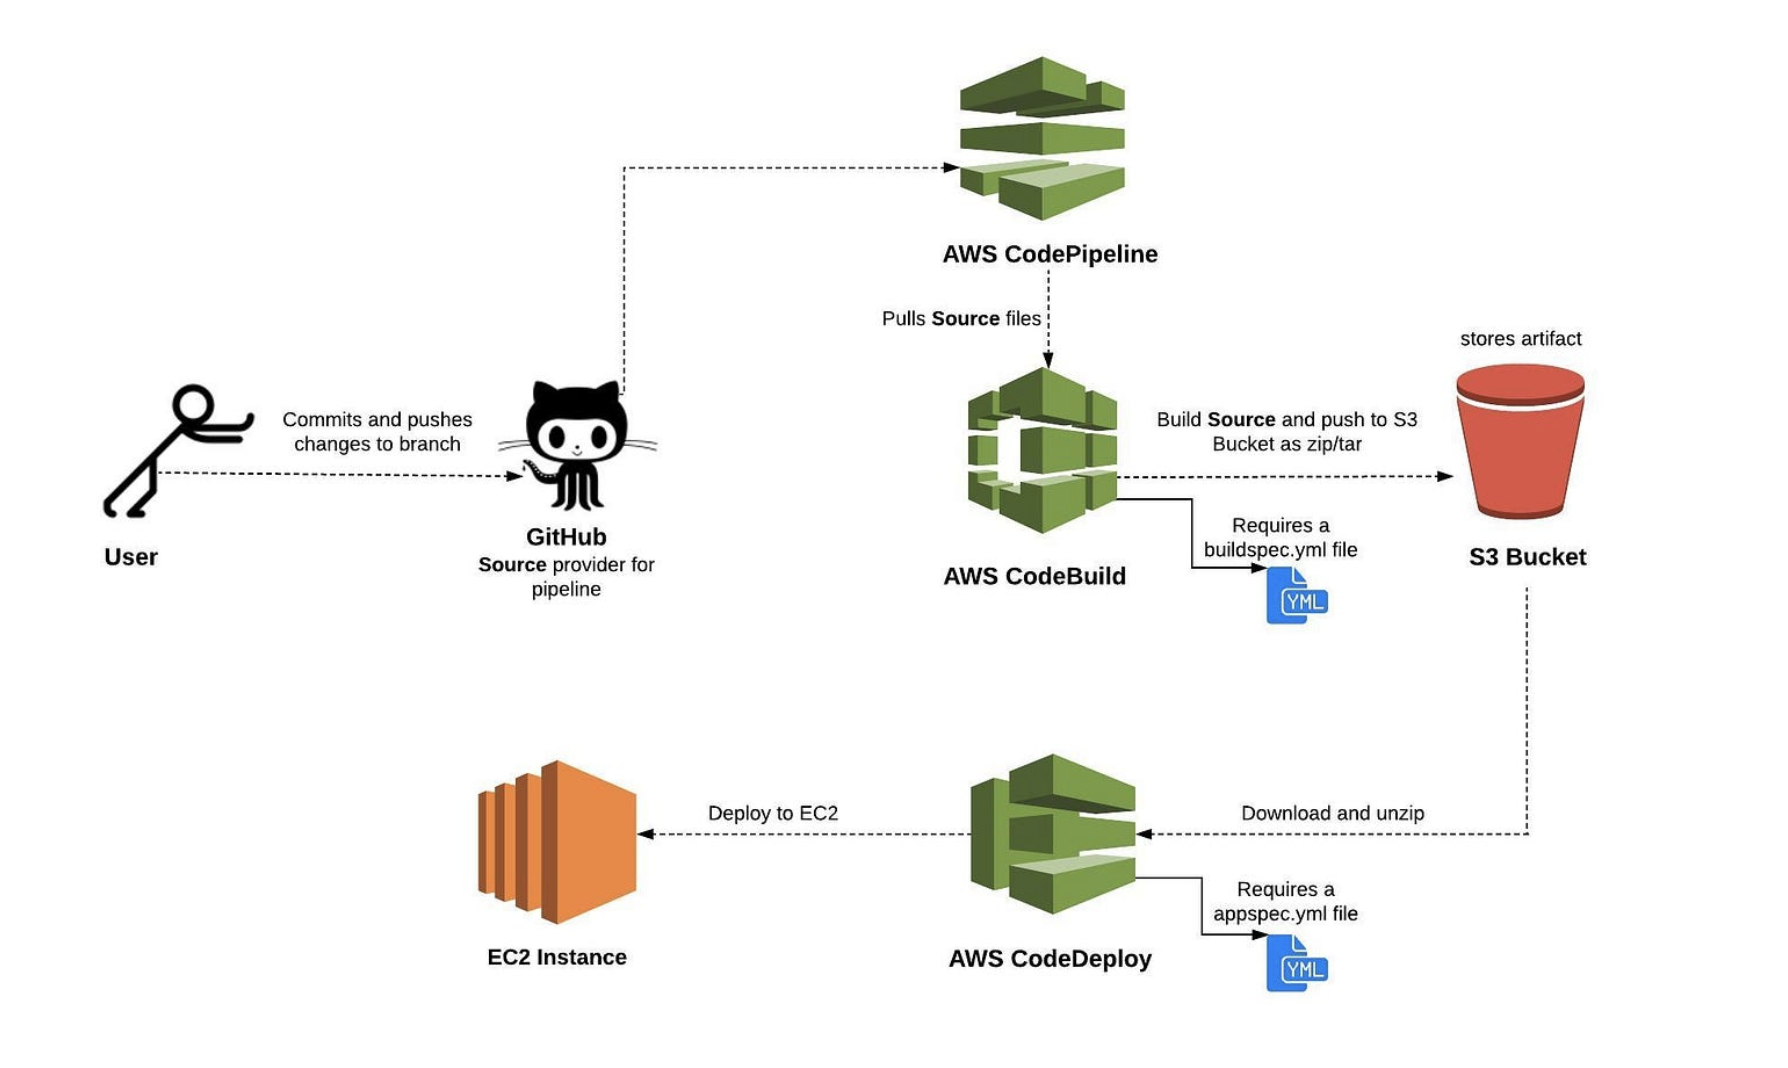
There has recently been an increase in the quantity of applications being created and "pushed" to the cloud. This article offers a thorough guide on how developers can deploy their front-end applications to a cloud service provider. The steps that may be done to successfully deploy a frontend app to an AWS EC2 instance will be detailed in detail in this post, which will use AWS as the cloud provider. We will be utilizing AWS CodeBuild and CodeDeploy tools to set up our CI/CD pipeline that will automate the deployment process for our application.
Instead of launching a "hello world" app to start learning continuous integration and continuous delivery (CI/CD) via AWS CodePipeline, I constructed a react app that retrieves movies, their IMDB rating, and other information from the open movie database using the OMDB API.
The setup of your AWS CodePipeline and the deployment of your frontend project to an AWS instance are the main topics of this post. I'll be using a ReactJS application to demonstrate for demonstration. We'll assume you already have an IAM user set up, an AWS account, and a frontend application on GitHub that's prepared for deployment.
For ease of browsing, this article has been broken up into sections. We will discuss the following subjects in this article:
- Introduction
- Create an IAM Role for EC2 and AWS CodeDeploy
- Launch an EC2 instance
- Create a code pipeline using Github, CodeBuild and CodeDeploy
- Access your frontend app on EC2's public DNS
- Final thoughts
1. Introduction
React is a declarative, effective, and adaptable JavaScript library for creating user interfaces is ReactJS. It is a front-end component-based open-source library that is only in charge of the application's view layer.
Based on the V8 JavaScript engine in Chrome, Node.js is a JavaScript runtime. The event-driven, non-blocking I/O mechanism used by Node.js makes it quick and effective.
The most complete and widely used cloud platform in the world, Amazon Web Services (AWS), provides over 175 fully functional services from data centres across the world. AWS is being used by millions of users to save expenses, increase flexibility, and accelerate innovation. Some of the key services offered by AWS include computing, storage, databases, migration, networking and content delivery, management tools, security & identity compliance, and messaging.
2. Create IAM Role for EC2 and AWS CodeDeploy
An AWS service needs permissions to access AWS resources, and those permissions are granted via AWS service roles. Which AWS resources the service can access and what it can do with those resources are determined by the policies that you attach to the service role.
Let's search for the IAM service in our AWS Management Console. Now, make a new role for AWS CodeDeploy and EC2:
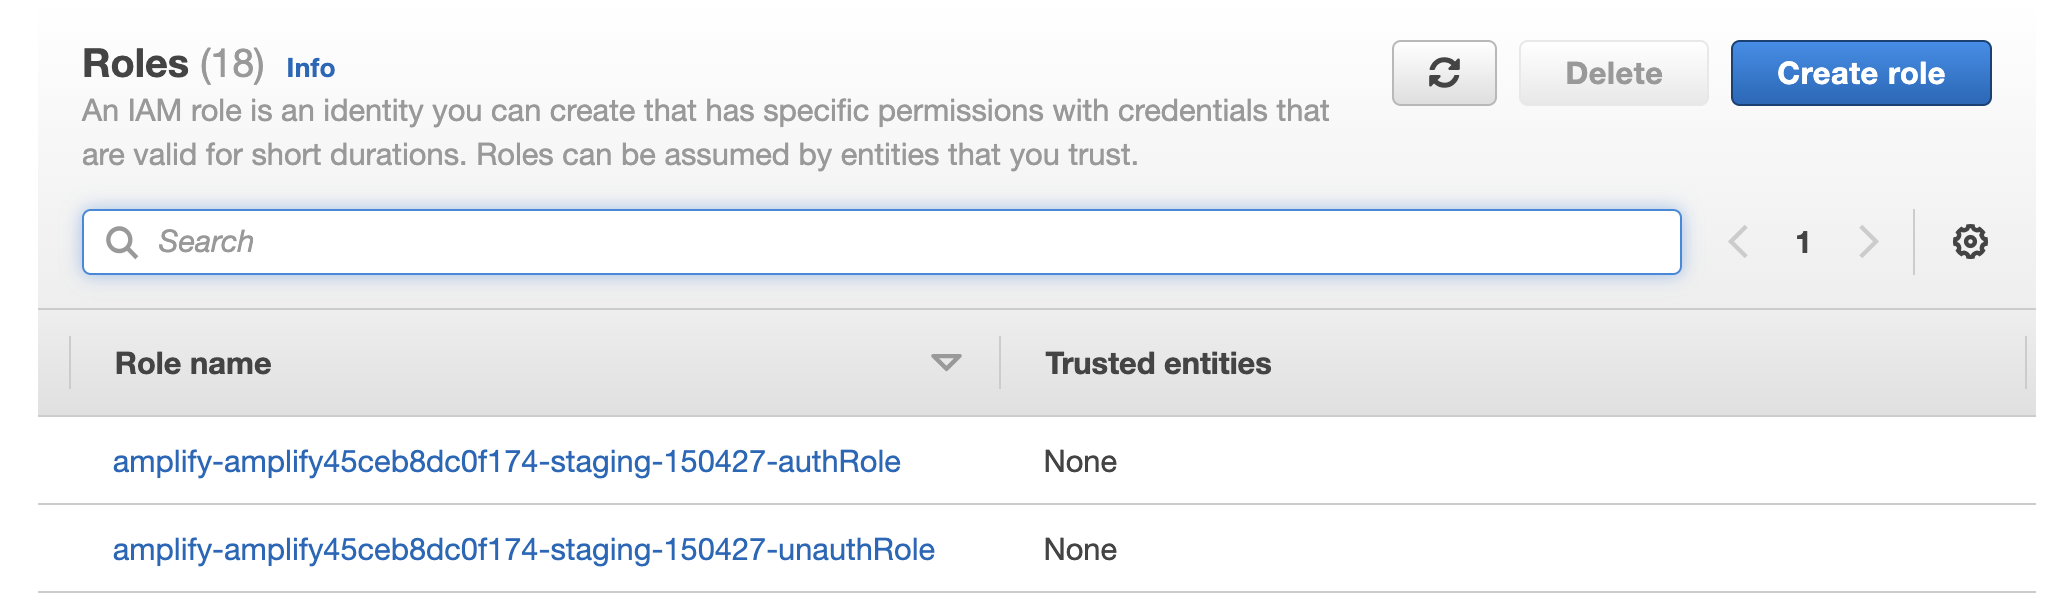
Identity and Access Management (IAM) — Roles Dashboard
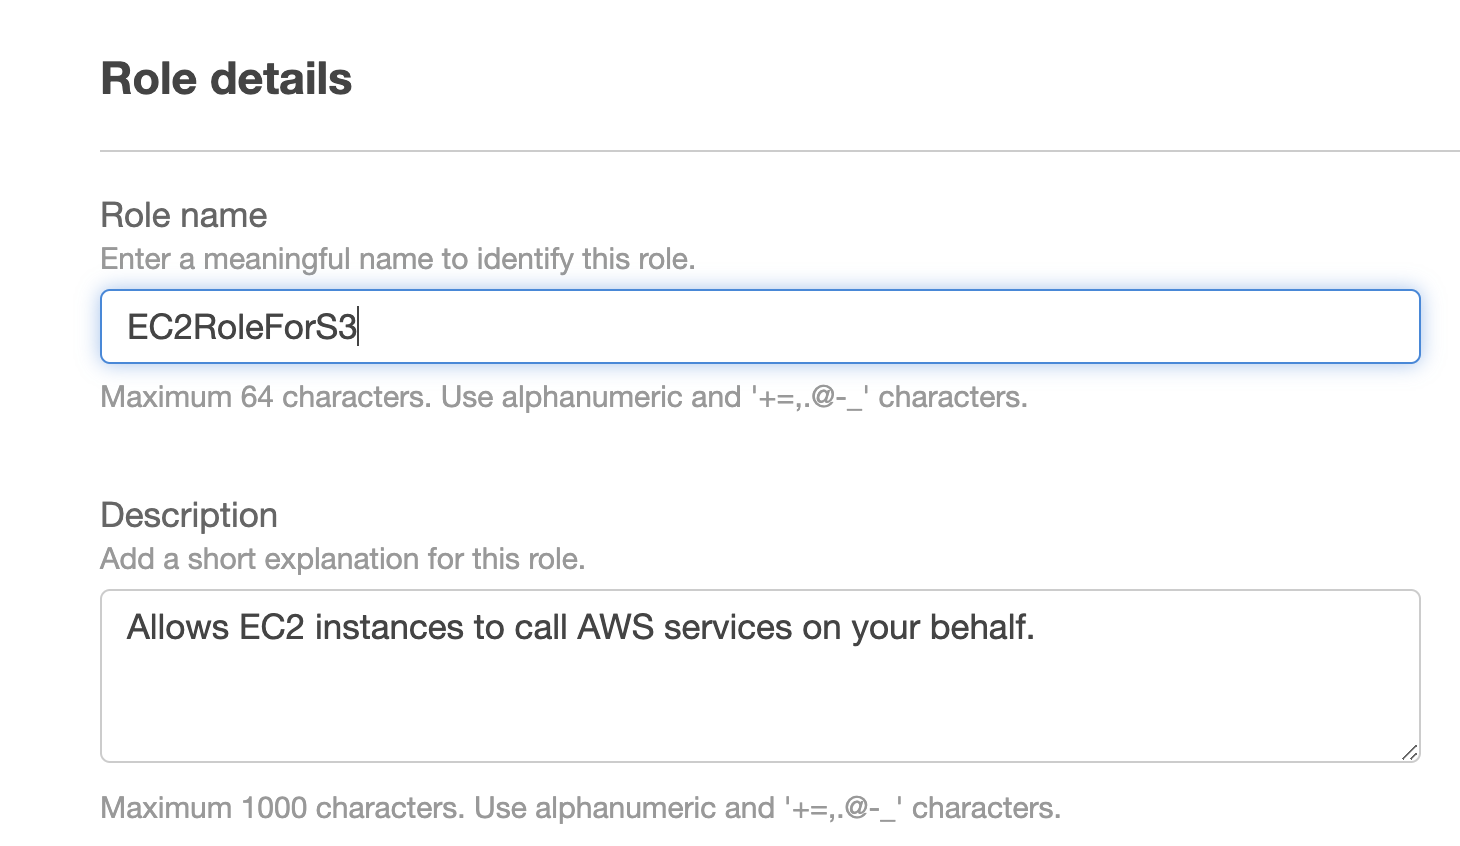
Create a new role for EC2 and attach the AmazonS3ReadOnlyAccess policy, which will allow our EC2 instance to access stored artifacts from the Amazon S3 bucket.
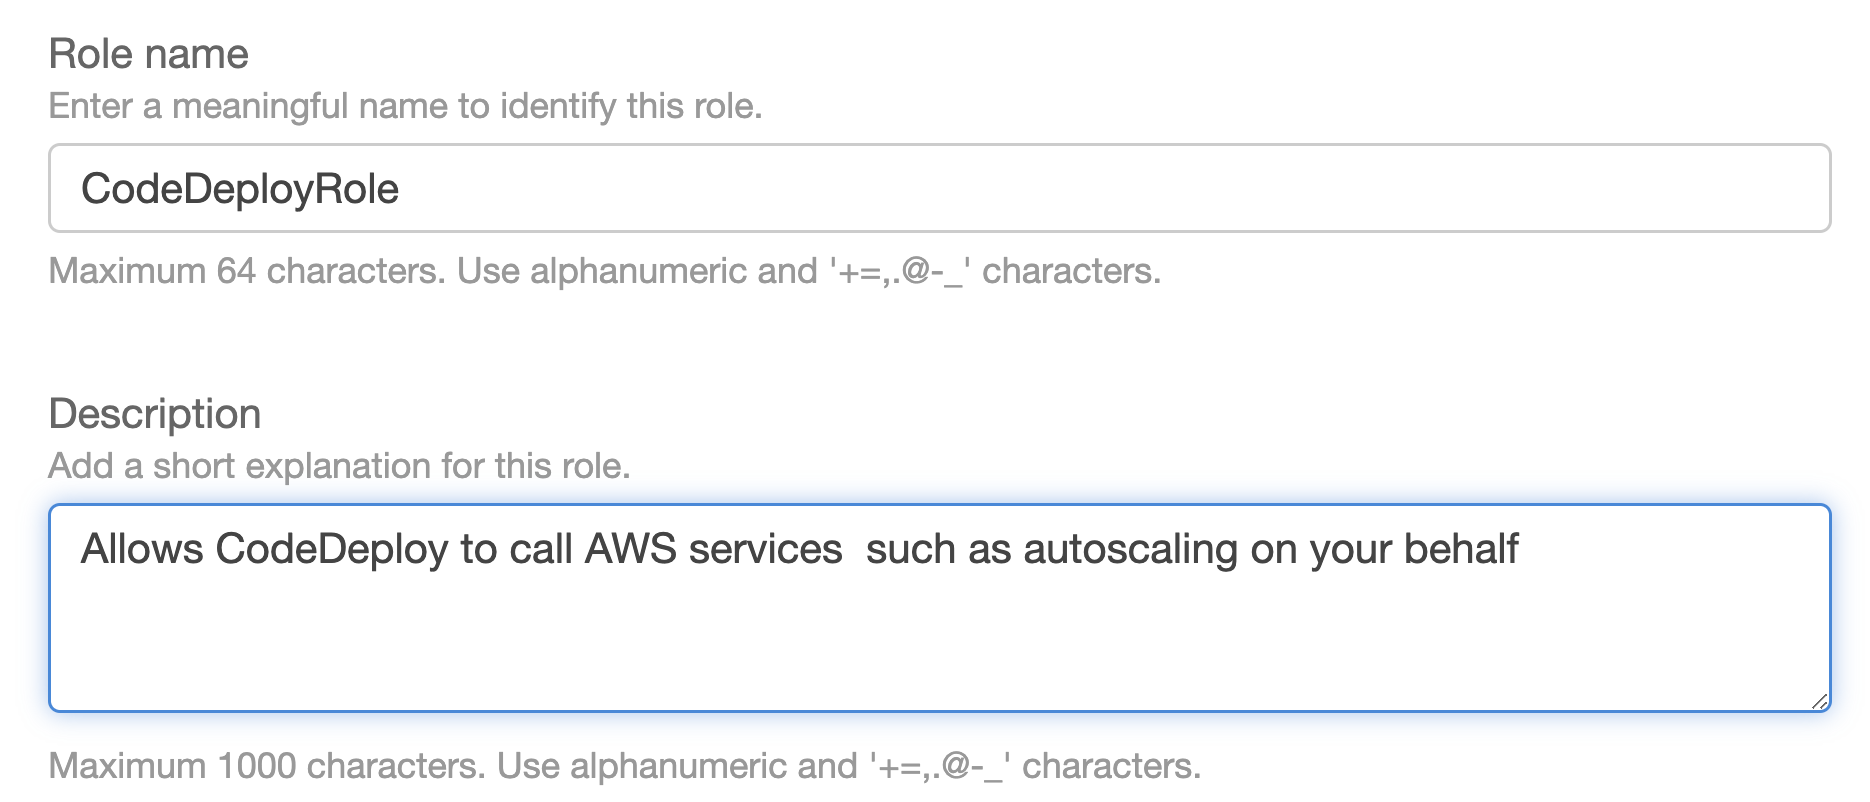
Make a new service role for CodeDeploy and add the AWSCodeDeployRole policy, which will provide our service role the rights to read the tags on our EC2 instance, publish data to Amazon SNS topics, and much more.
3. Launch an EC2 instance
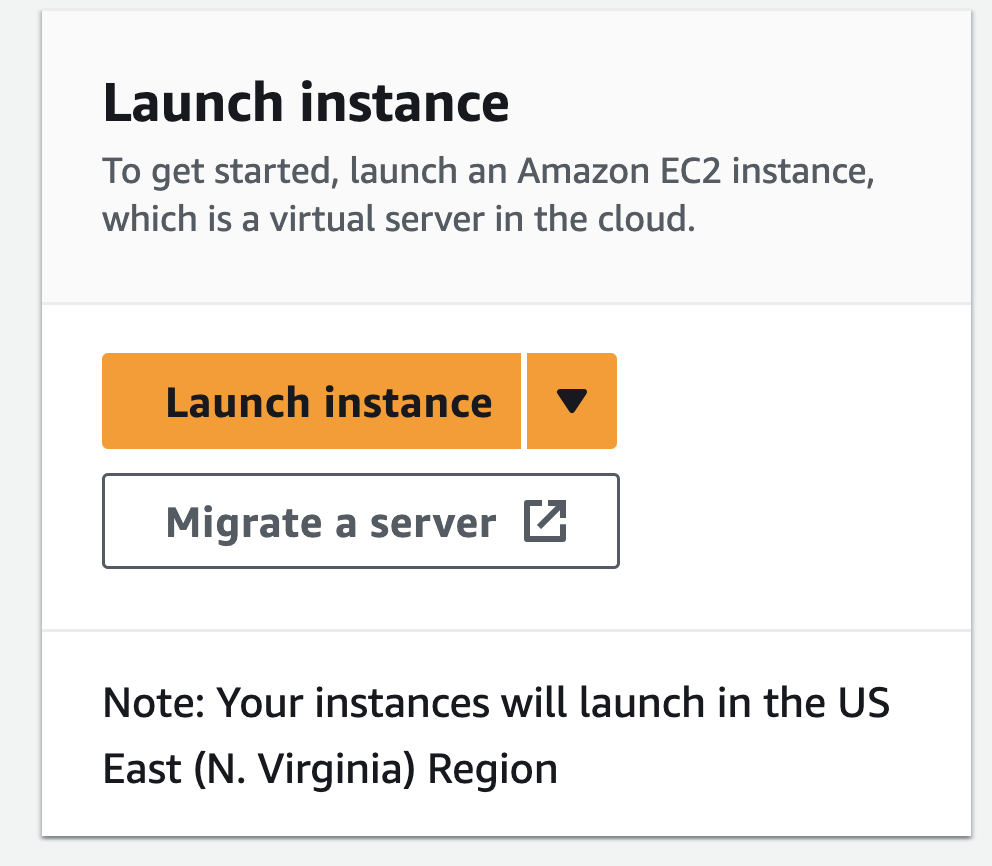
Let's now start up our EC2 instance! Clicking on EC2 under Compute in the AWS Management Console will lead us to the EC2 Dashboard page. Click Launch Instance.
EC2 Dashboard
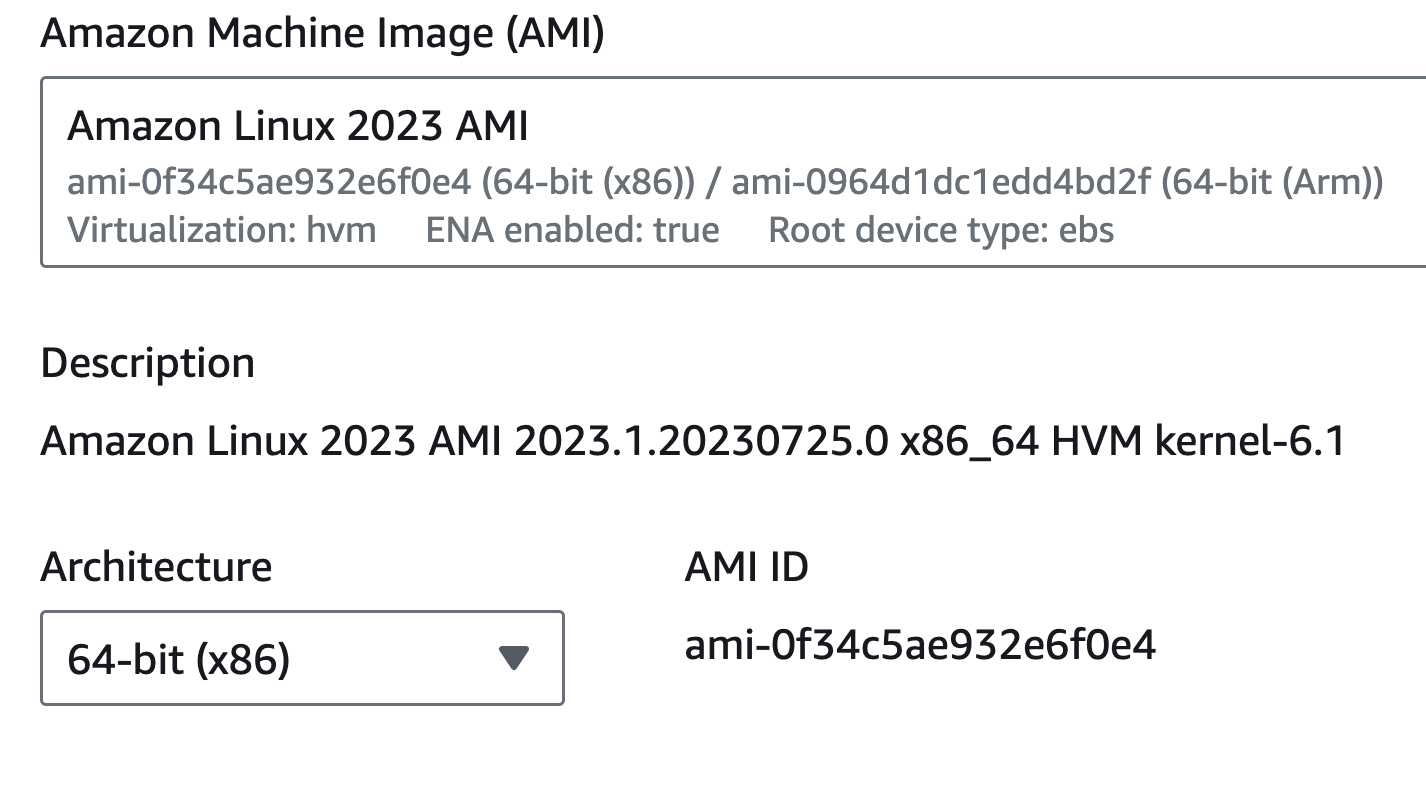
We will choose Amazon Linux 2023 AMI as our Amazon Machine Image(AMI) for launching our instance.
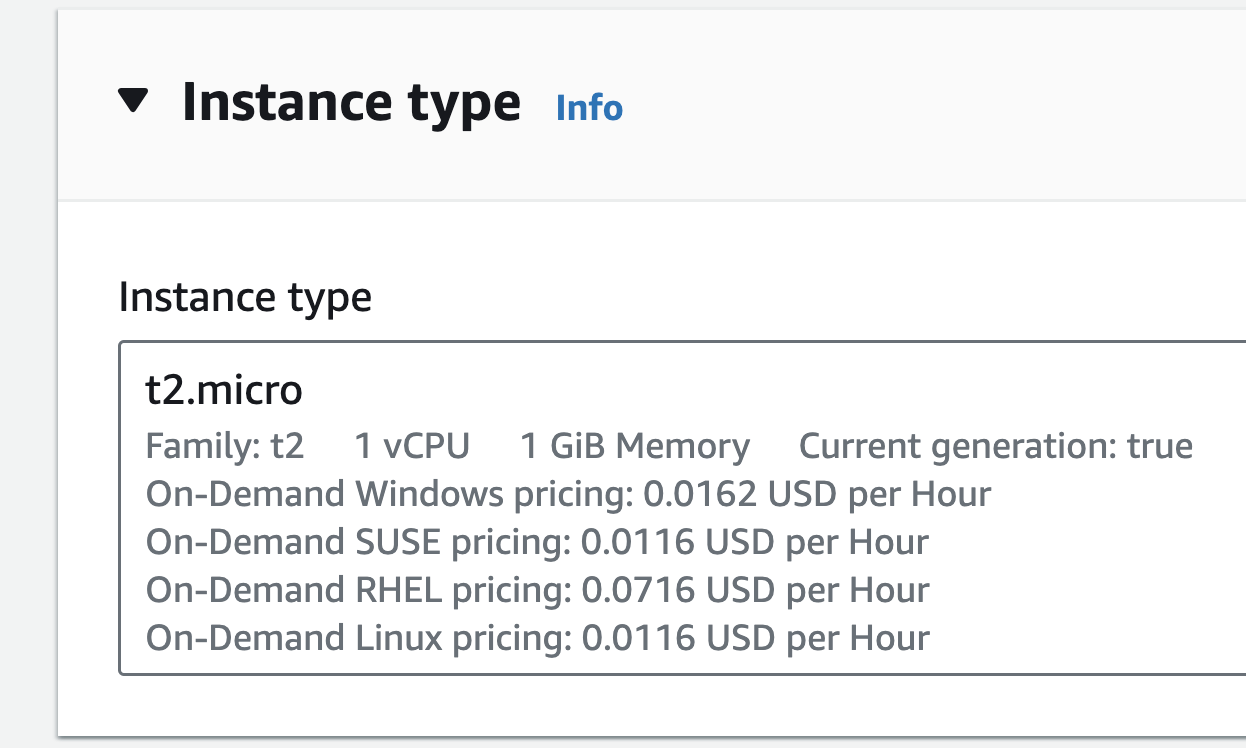
Choose an Instance Type
Additionally, select the IAM role with the AmazonS3ReadOnlyAccess policy that we previously defined for EC2.
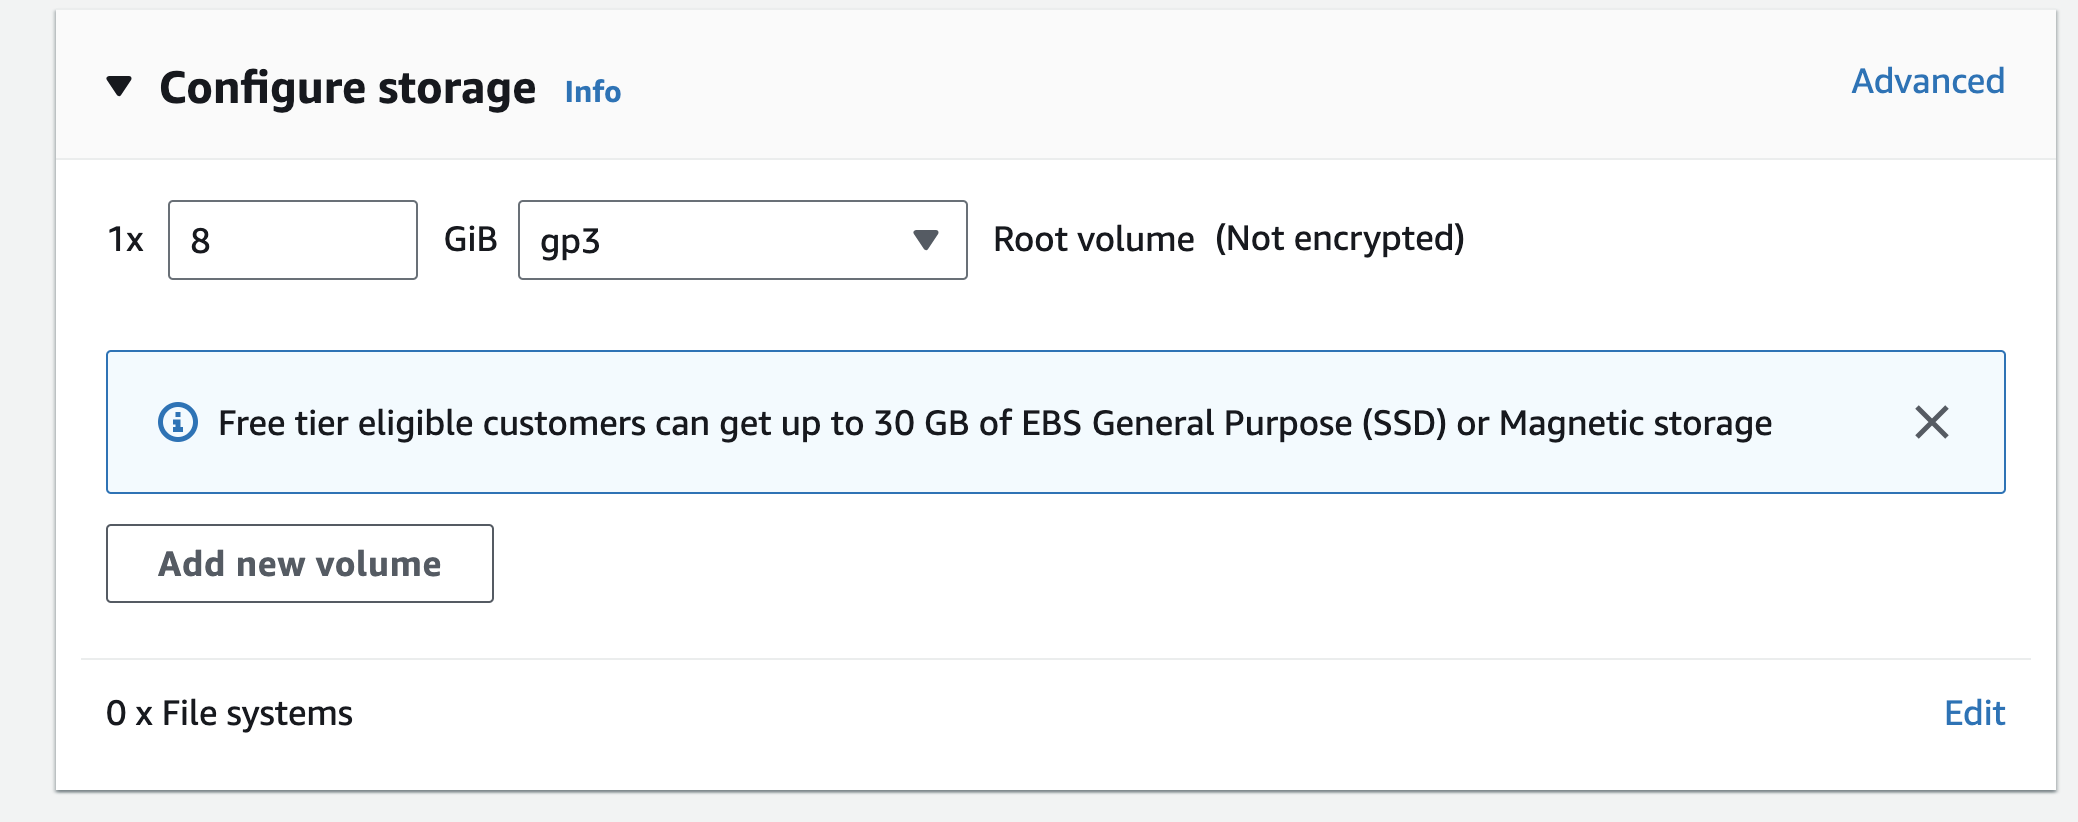
The storage device parameters mentioned above will be used to launch our instance. You can modify the root volume's settings as well as add more EBS volumes and instance store volumes to your instance.

You can optionally add your own metadata in the form of tags tags to each resource to help you manage your instances, photos, and other Amazon EC2 resources.
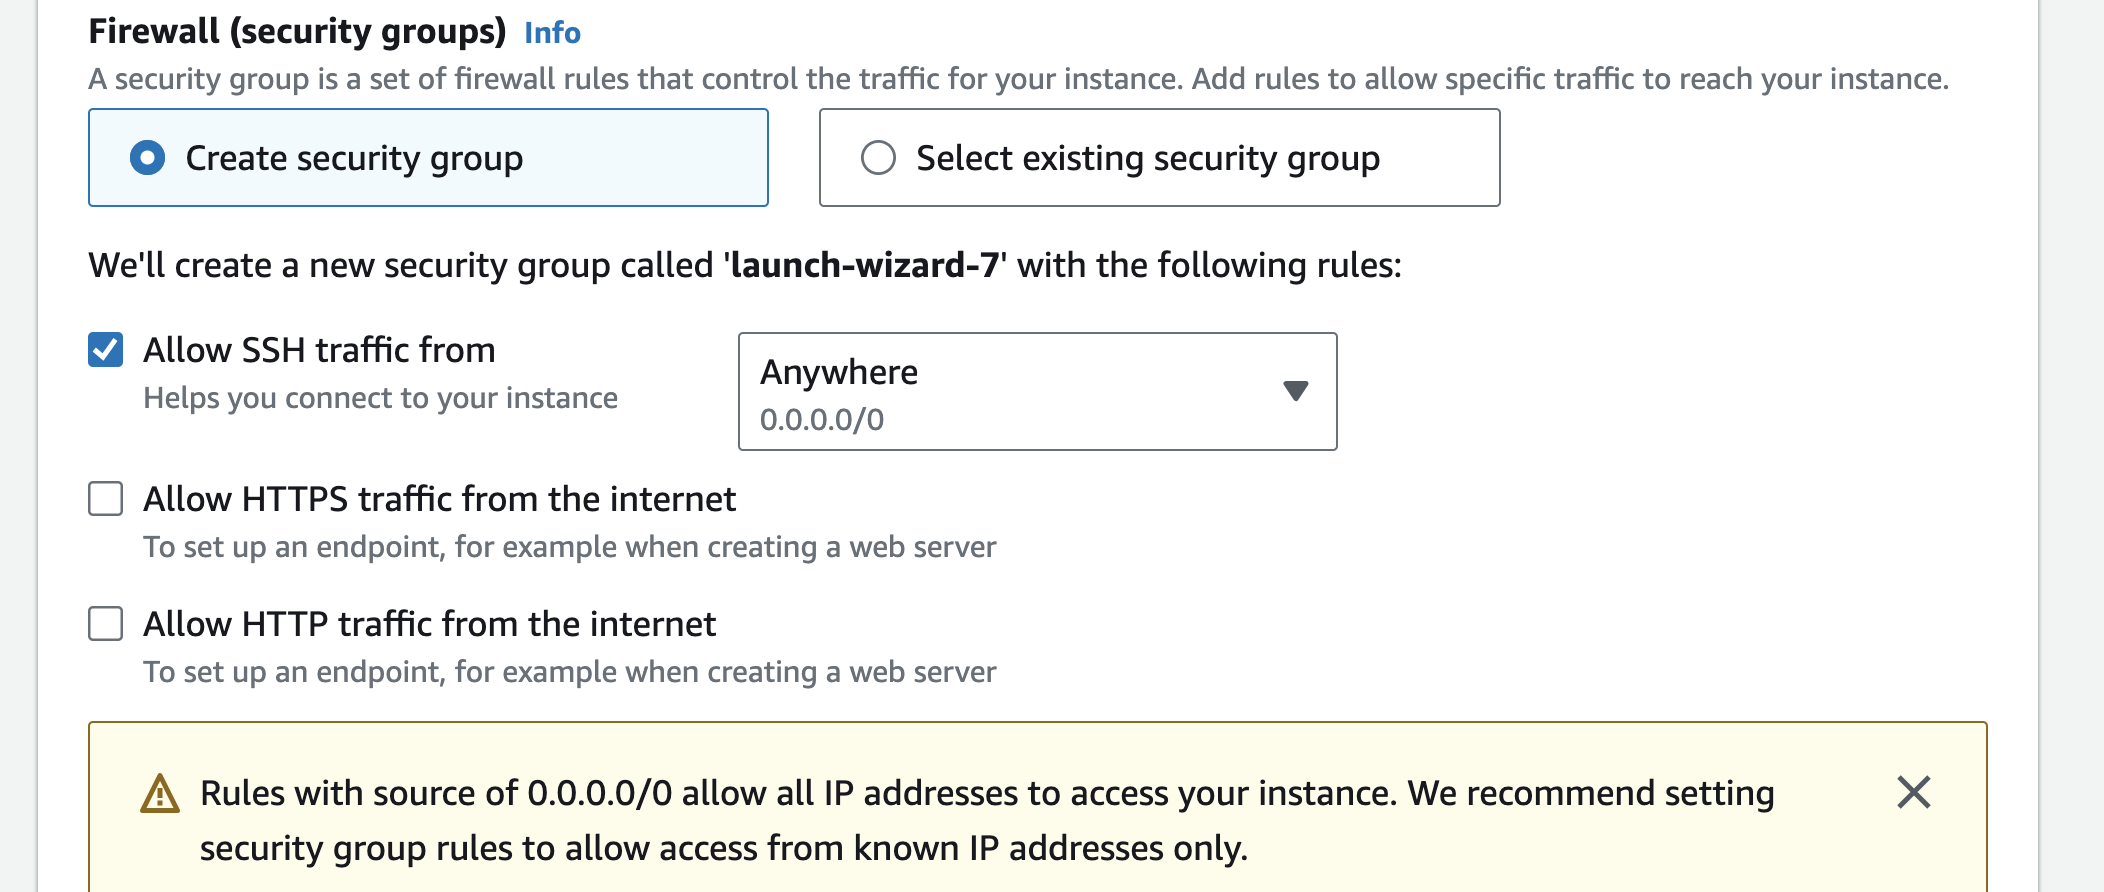
On this page, you can add firewall rules to allow specific traffic to reach your instance.
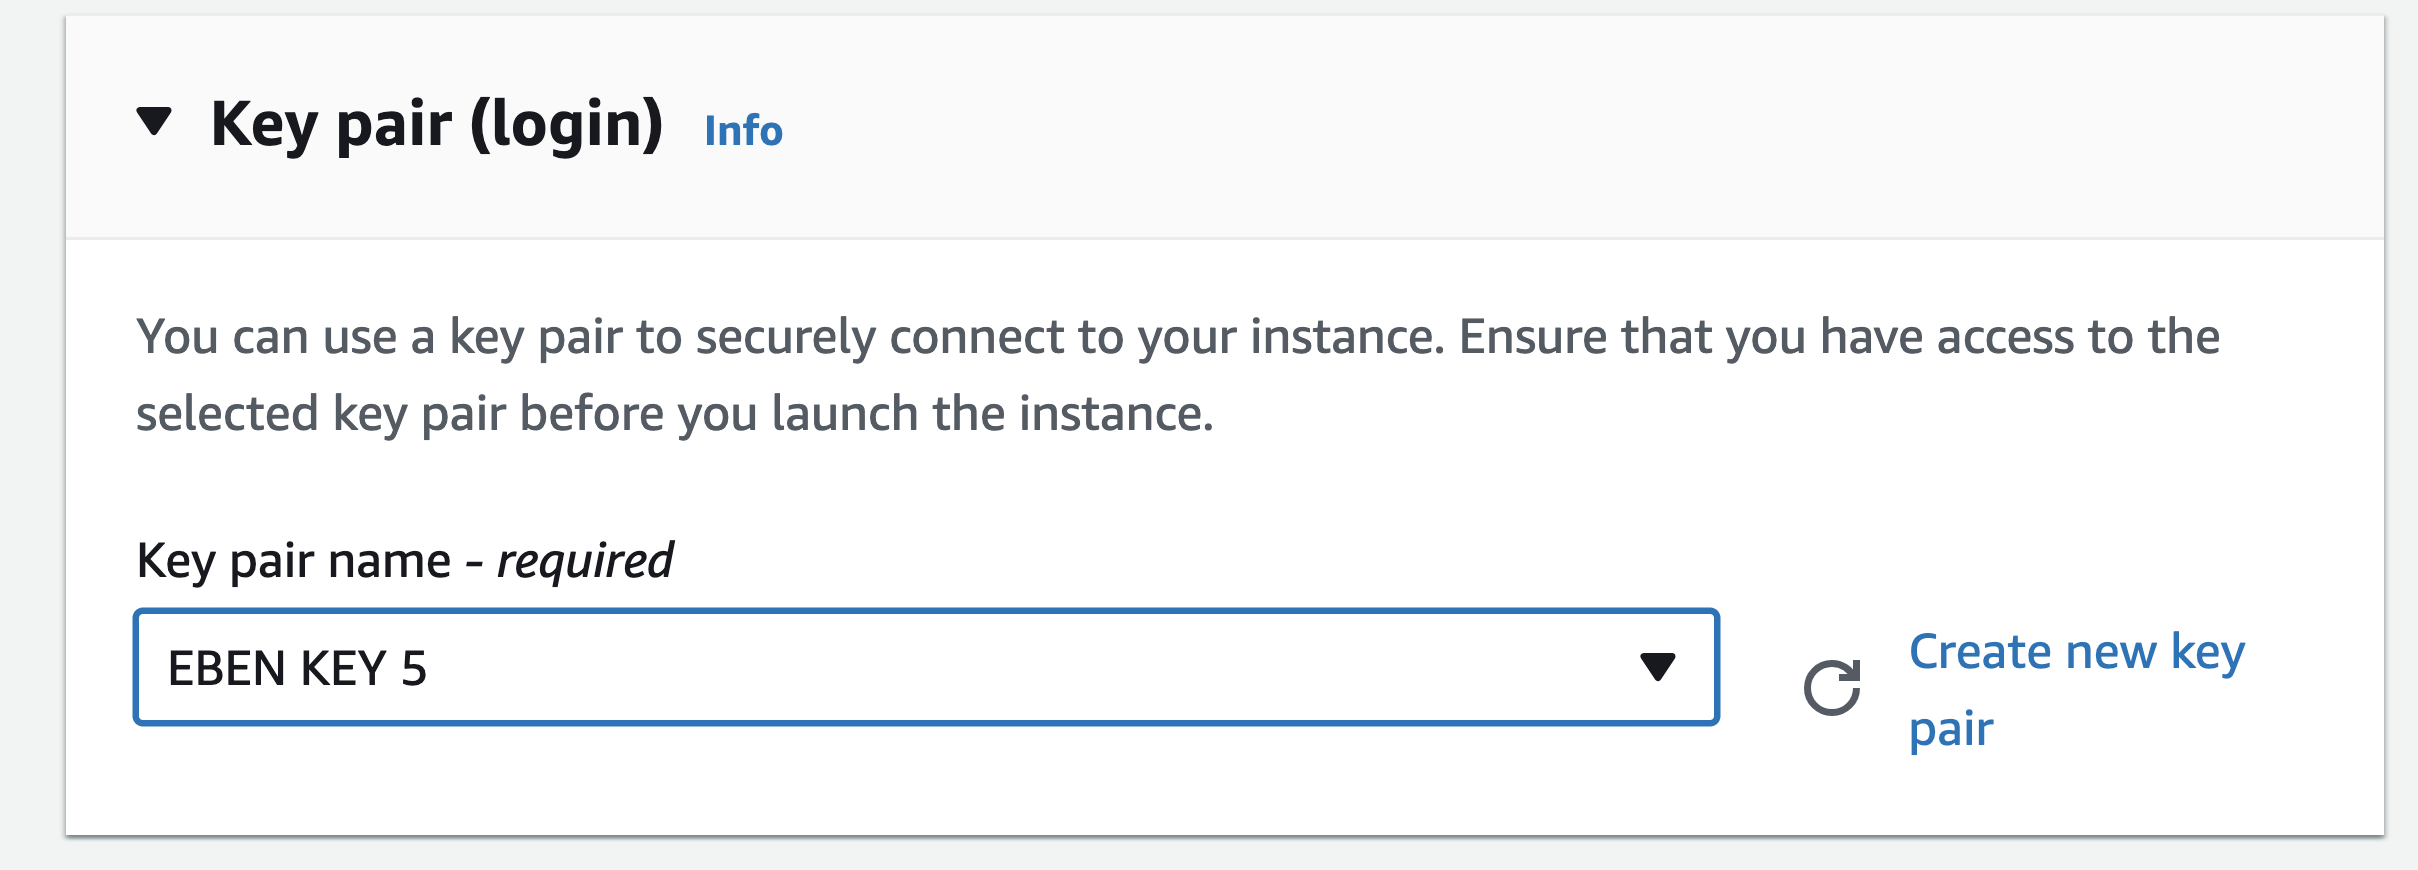
You will now be prompted to check the configuration of your EC2 instance and generate a key pair so that you may connect to it. Click Download Key Pair to download the .pem key to your computer using an existing key or a new key pair you've created. Select Launch Instances after downloading Key Pair, then wait for your instance to launch. The instance will now be running in a few minutes when you click View Instances to go back to your EC2 dashboard.

Here we go; your EC2 instance has now been successfully launched.
4. Create a CodePipeline using Github, CodeBuild and CodeDeploy
You may automate the release process for your app or service using the continuous integration and continuous delivery (CI/CD) AWS solution called CodePipeline. CodePipeline automatically builds, tests, and deploys your code depending on the release process models you establish when initializing your CodePipeline each time you commit a code update to your source (GitHub, AWS CodeCommit, etc.). You are now able to offer features and updates with speed and dependability.
Step 1: CodePipeline
Step 2: Code Source (CodeCommit or Github)
Step 3: CodeBuild and Build Specification (buildspec.yaml) File
Step 4: CodeDeploy and Application Specification (appspec.yml ) File
Step 5: Review
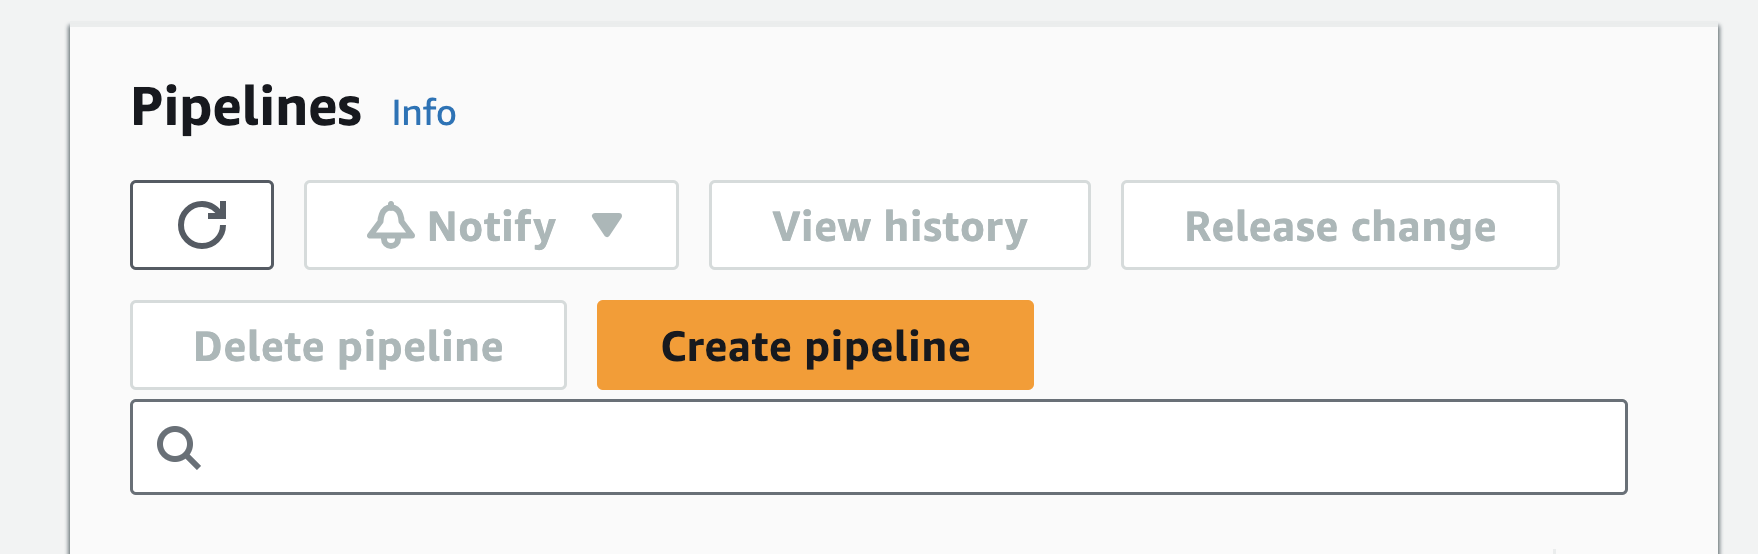
Step 1: CodePipeline
Let's use the AWS Management Console to access CodePipeline and select Create pipeline.
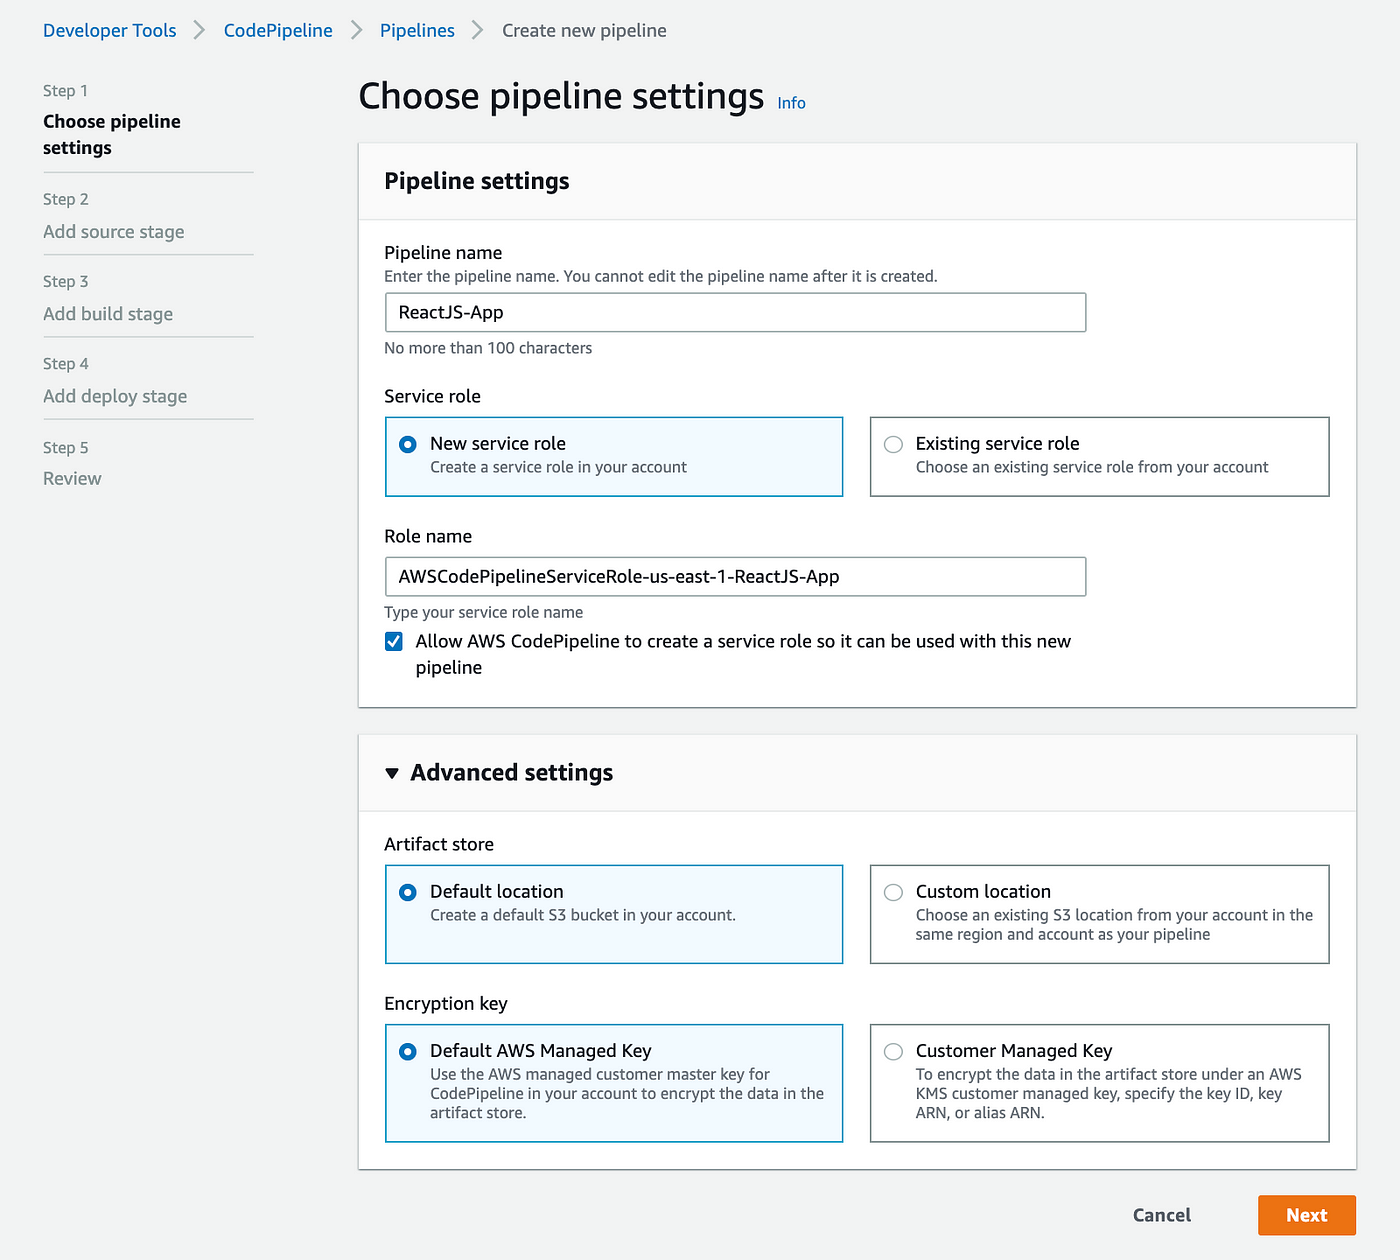
This page will also establish a new service role for your new pipeline. To store artefacts, we may either let AWS establish a new S3 bucket, or if you'd prefer to use an already-existing S3 bucket in the same region, choose "Custom location" and then your preferred S3 bucket.
Step 2: Code Source (CodeCommit or Github)
AWS offers five ways, as of August 2023, to supply the pipeline's source code: AWS CodeCommit, Amazon ECR, Amazon S3, Bitbucket Cloud (beta), and Github. GitHub and AWS CodeCommit are rather comparable; in this post, we will combine GitHub and AWS CodePipeline.
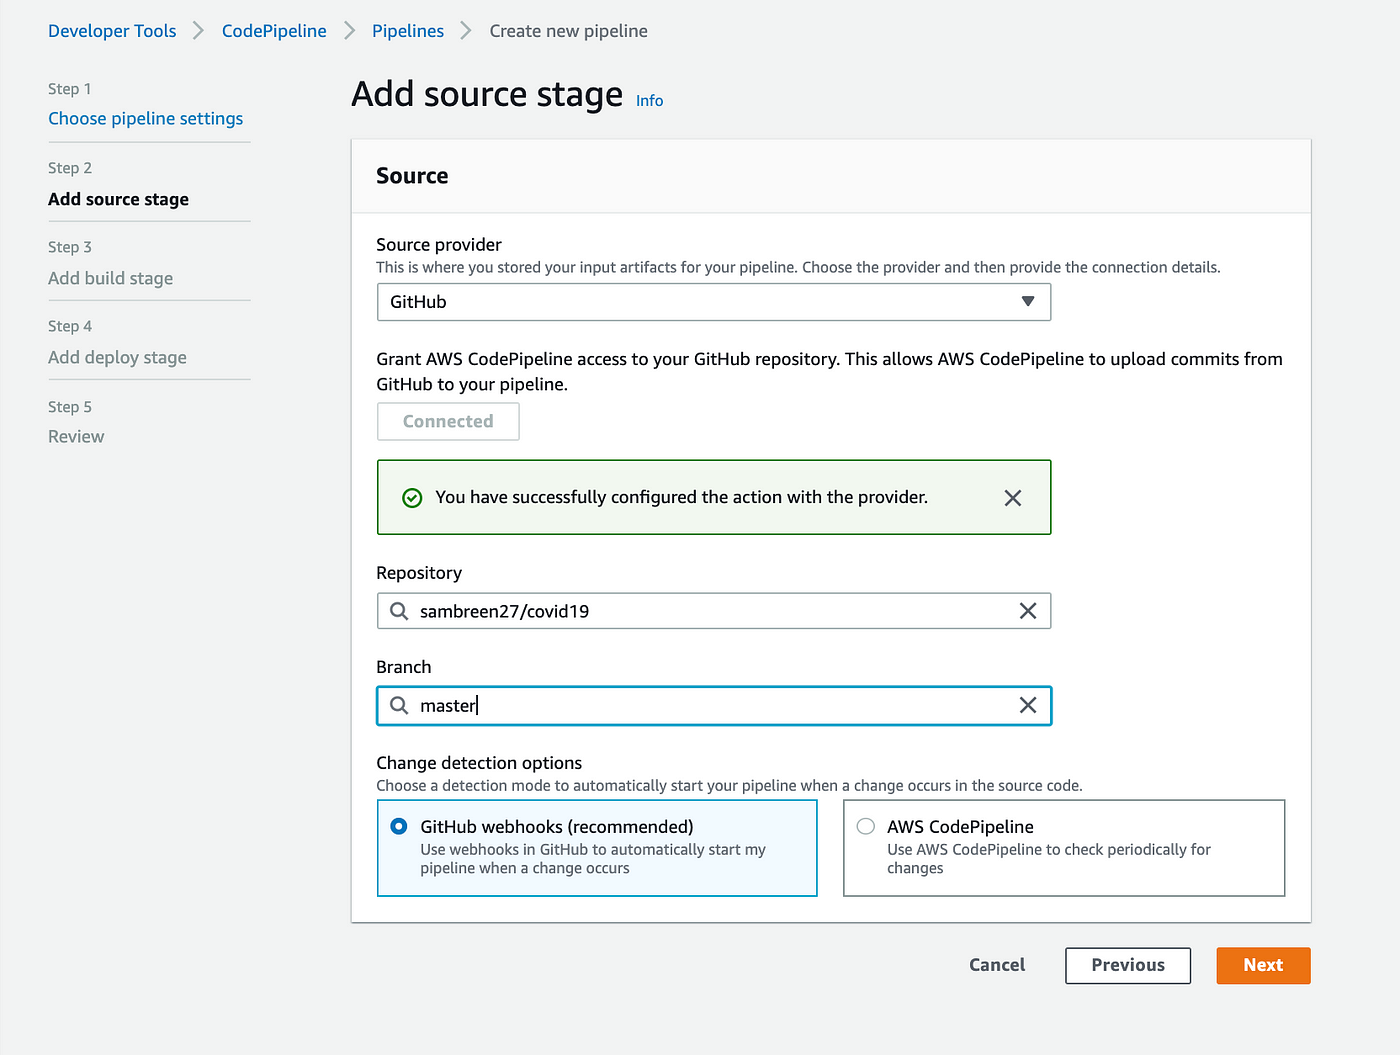
Click the Connect to GitHub button after choosing GitHub as the source provider. After that, you'll be asked to input your GitHub login information.

You can choose a repository and branch for CodePipeline to use when uploading commits to this repository to your pipeline after granting AWS CodePipeline access to your GitHub repository.
Step 3: CodeBuild and Build Specification (buildspec) File
The build provider definition will now be carried out. AWS CodeBuild and Jenkins are the two possibilities for build providers as of August 2023. AWS CodeBuild is a fully managed continuous integration service that assembles source code, conducts tests, and generates deployable software packages. Jenkins is a Java-based open-source automation platform with plugins created for continuous integration needs. Check out this article comparing Jenkins CI Server vs. AWS CodePipeline if you're unsure which one to utilize.
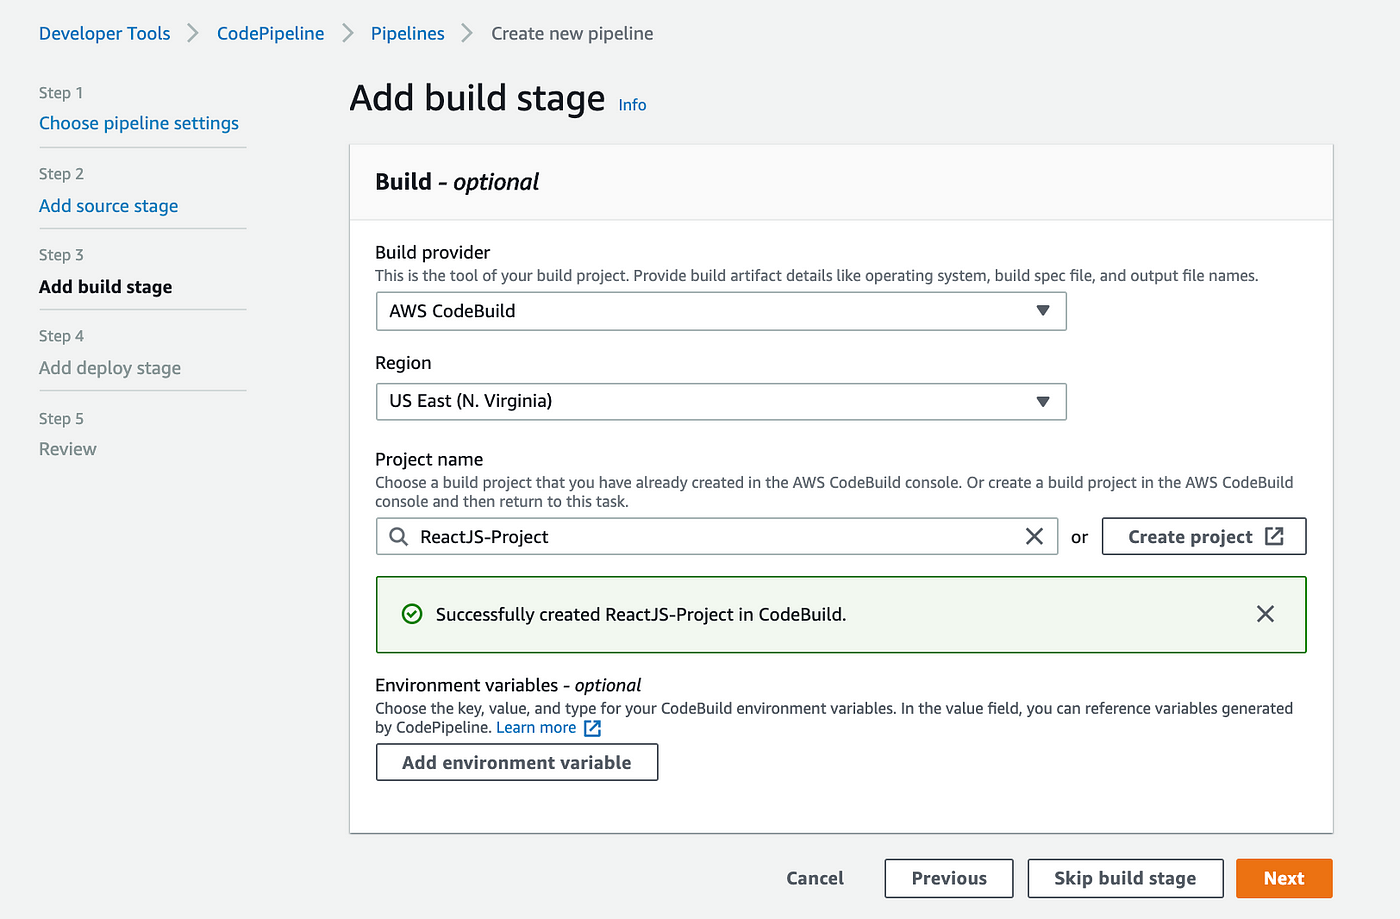
For the purpose of this tutorial, we will choose AWS CodeBuild as our build provider, and we will be prompted to choose a project:
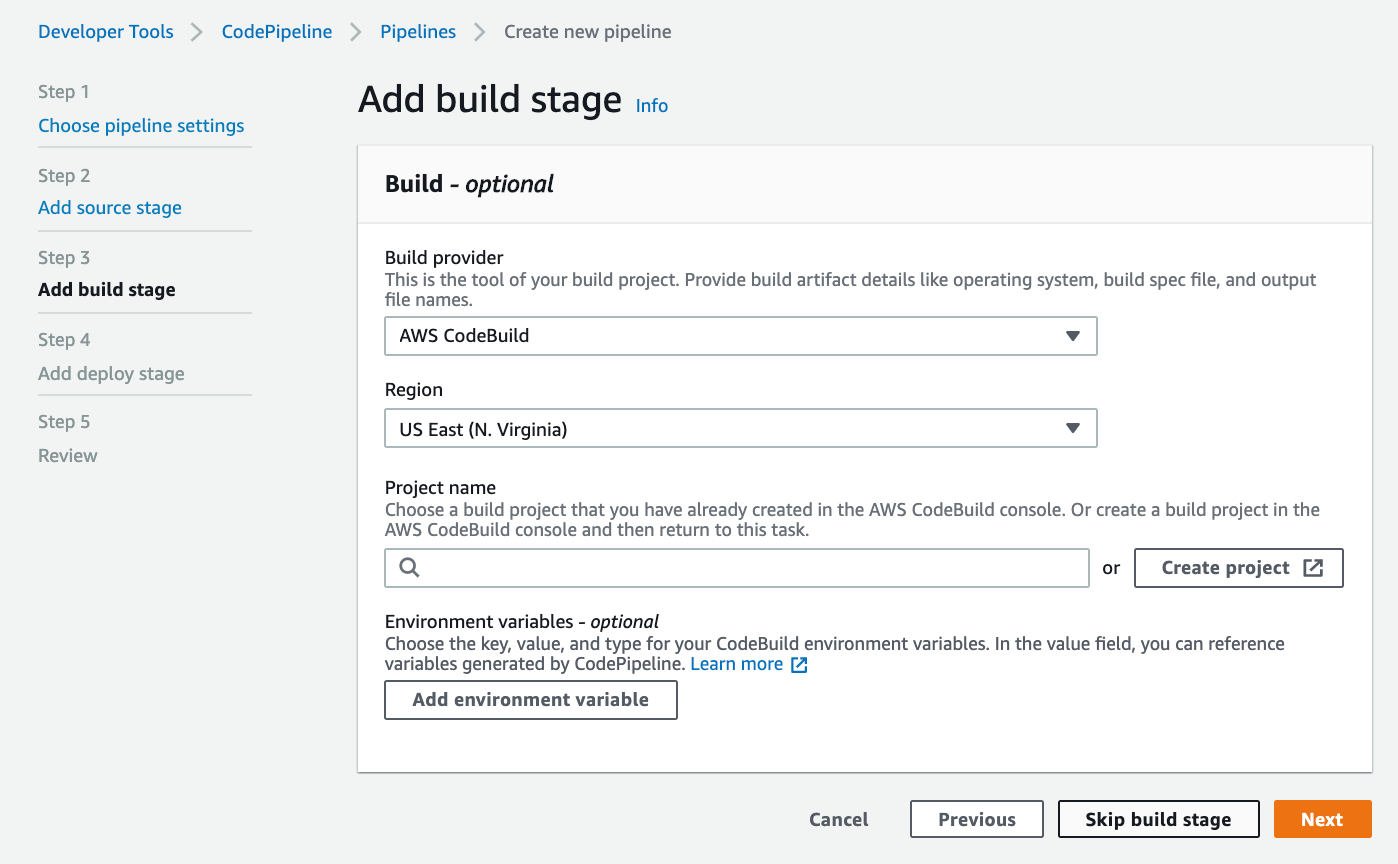
If, like me, you didn't create a project before constructing your pipeline, you may do so right now by selecting Create project, which will take us to the next page:
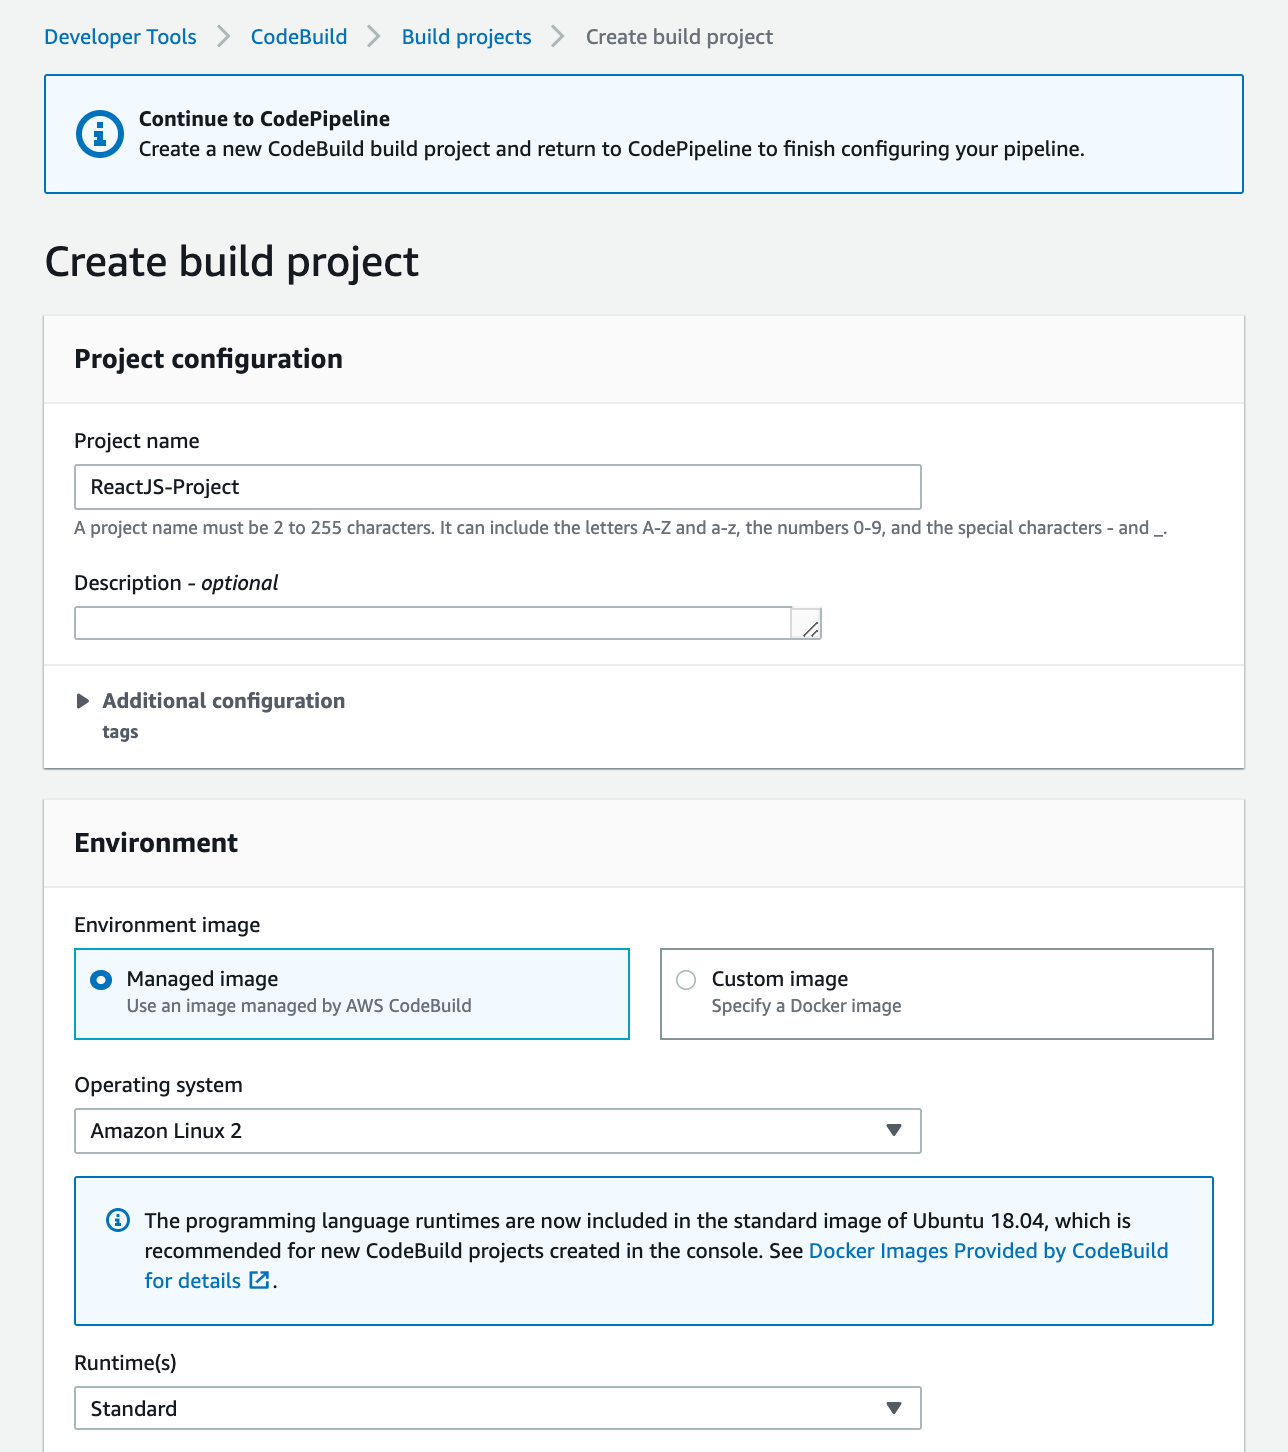
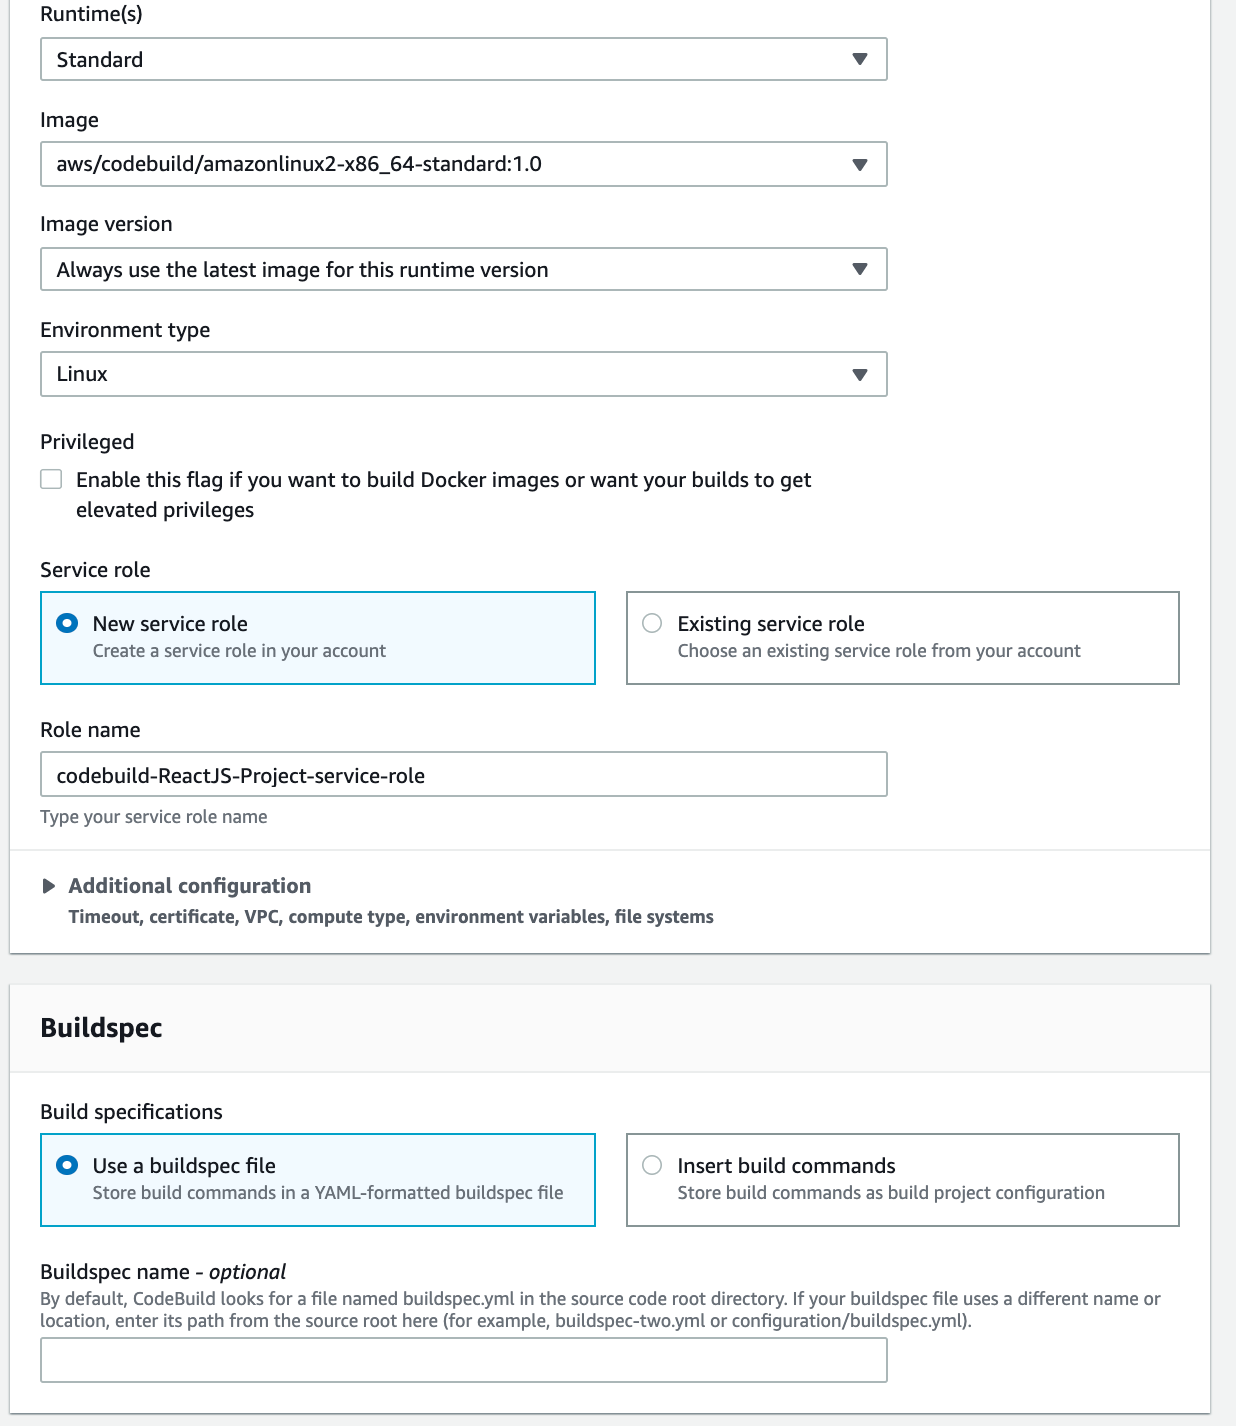
For AWS, a CodeBuild service role will be developed. AWS services that depend on CodeBuild are interacted with by CodeBuild on your behalf.
We will now quickly go through what a buildspec file is. CodeBuild employs a buildspec file, which is a collection of build commands and associated settings in YAML format. I made a buildspec.yaml file for my project and placed it in the root of my project directory:
buildspec.yaml
# Do not change version. This is the version of aws buildspec, not the version of your buldspec file.
version: 0.2
phases:
 pre_build:
   commands:
     #installs dependencies into the node_modules/ directory
     - npm install
 build:
   commands:
     - echo Build started on `date`
     - echo Compiling
     - npm run build
 post_build:
   commands:
     - echo Build completed on `date`
# Include only the files required for your application to run.
artifacts:
 files:
   - public/**/*
   - src/**/*
   - package.json
   - appspec.yml
   - scripts/**/*
If our project directory doesn't contain a buildspec file, we may still store build commands by choosing Insert build commands and providing the required commands. Let's click Continue to CodePipeline after we're finished.
We will return to this page once we have successfully generated a build project. Let's proceed to Step 4 now: By selecting Next, add the Deploy stage.
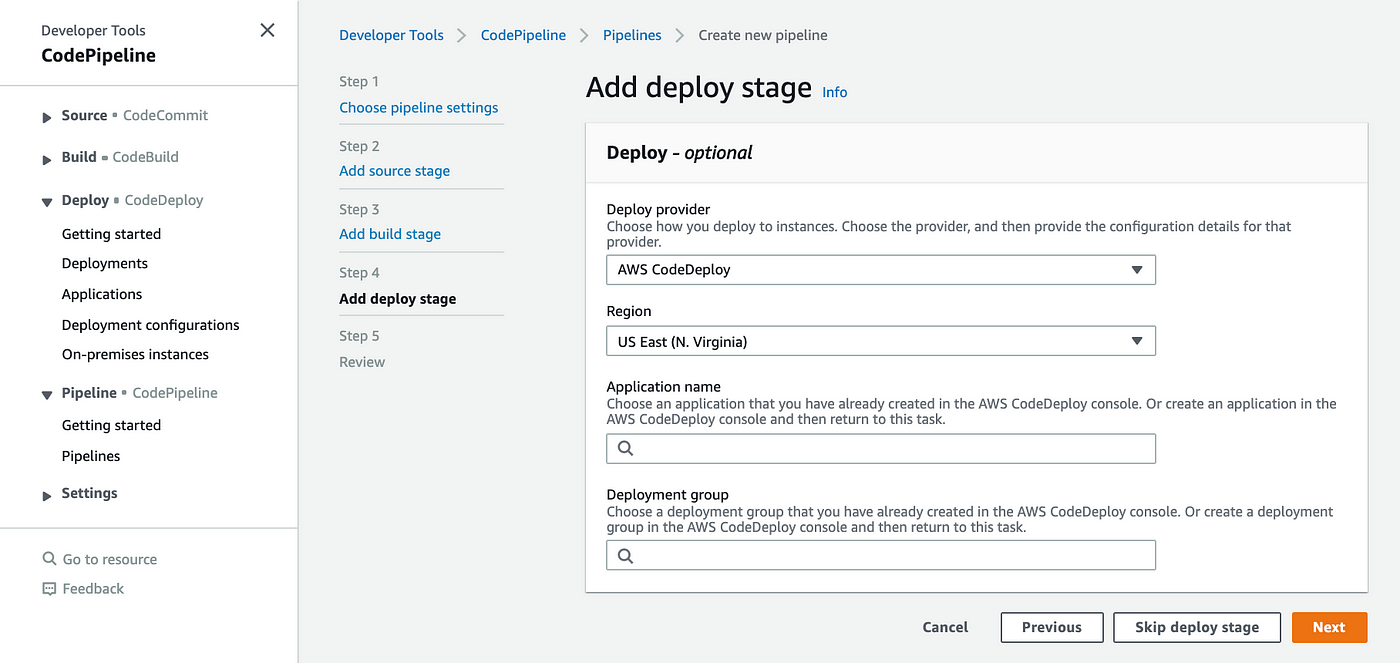
Step 4: CodeDeploy and Application Specification(appspec.yml) File
Software deployments to a range of computing services, including Amazon EC2, AWS Fargate, AWS Lambda, and your on-premises web server, are automated via the completely managed deployment solution AWS CodeDeploy. During the deployment process, you can update your application with little to no downtime. We will utilize AWS CodeDeploy as our deployment provider for this article.
An application in CodeDeploy is nothing more than a designation or container that the software uses to guarantee that the right revision, deployment configuration, and deployment group are referred to during a deployment. Therefore, let's start an application! If you look at the screenshot above, under Deploy in the left-hand column, right-click on Applications and choose "Open Link in New Tab." Click Create application once you're on the Applications page.
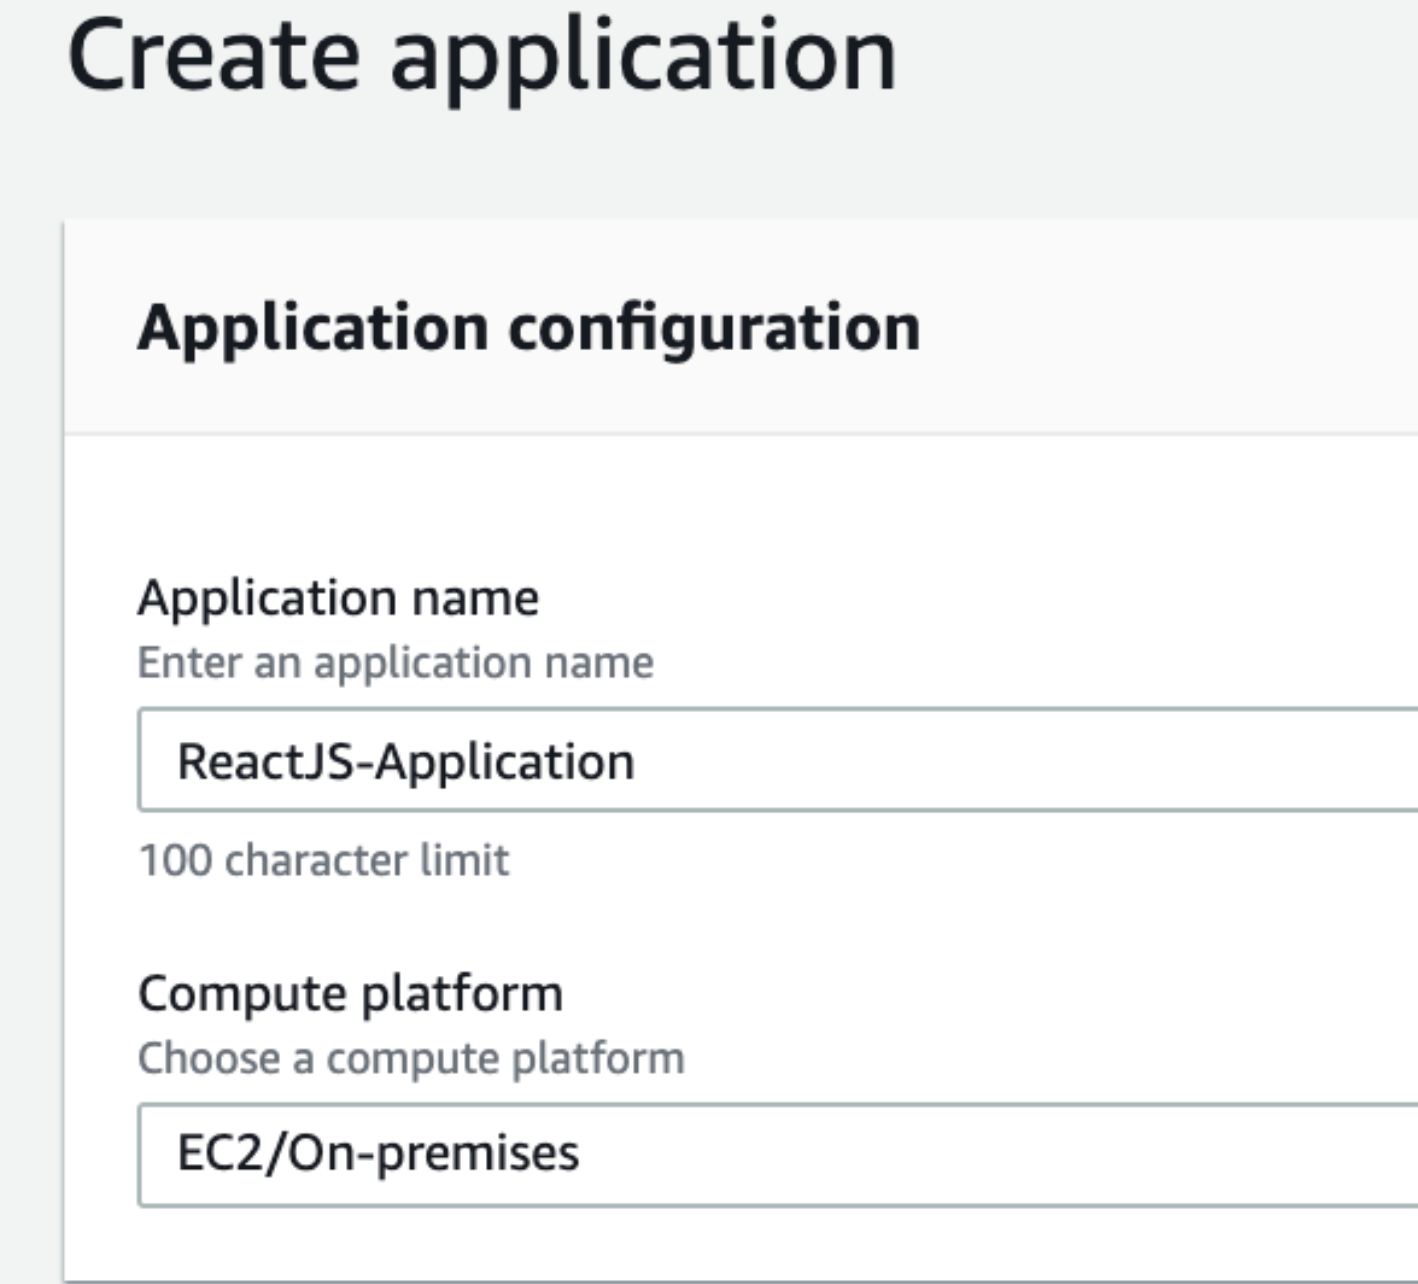
Create an application for CodeDeploy.

Here, we'll need to construct a deployment group for our application that details various deployment choices as well as the instances to which your application revisions are deployed.

We will choose the CodeDeployRole we previously generated with the AWSCodeDeployRole policy connected for the Service role.
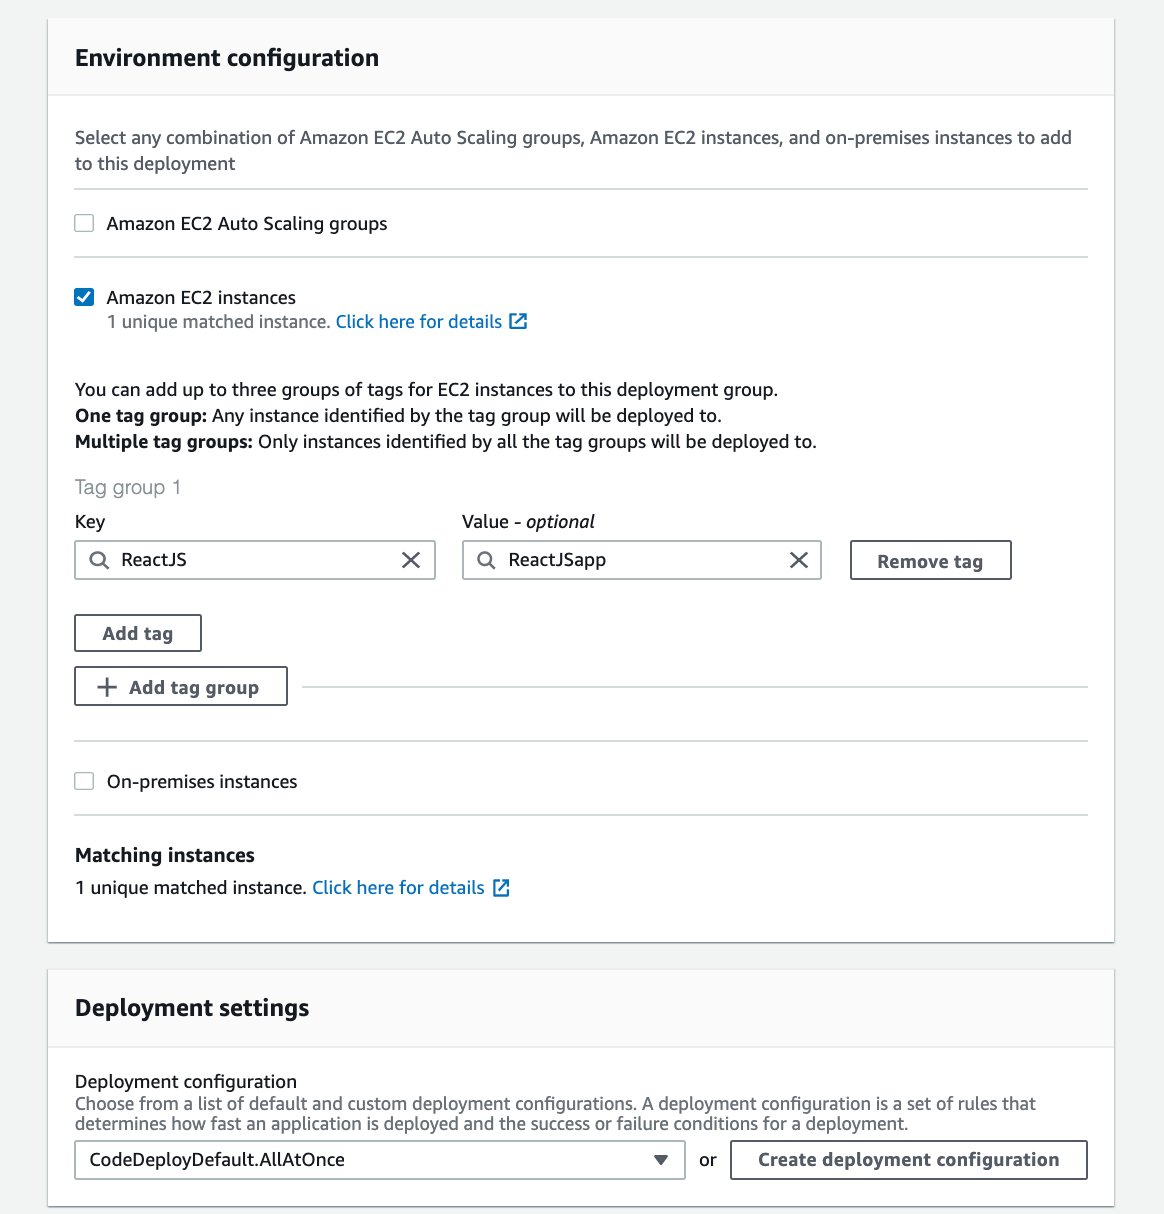
We will solely choose Amazon EC2 instances for our environment configuration. We will enter the values of the key-value combination we used to tag the instance previously when we created our EC2 instance in the Key and Value fields.
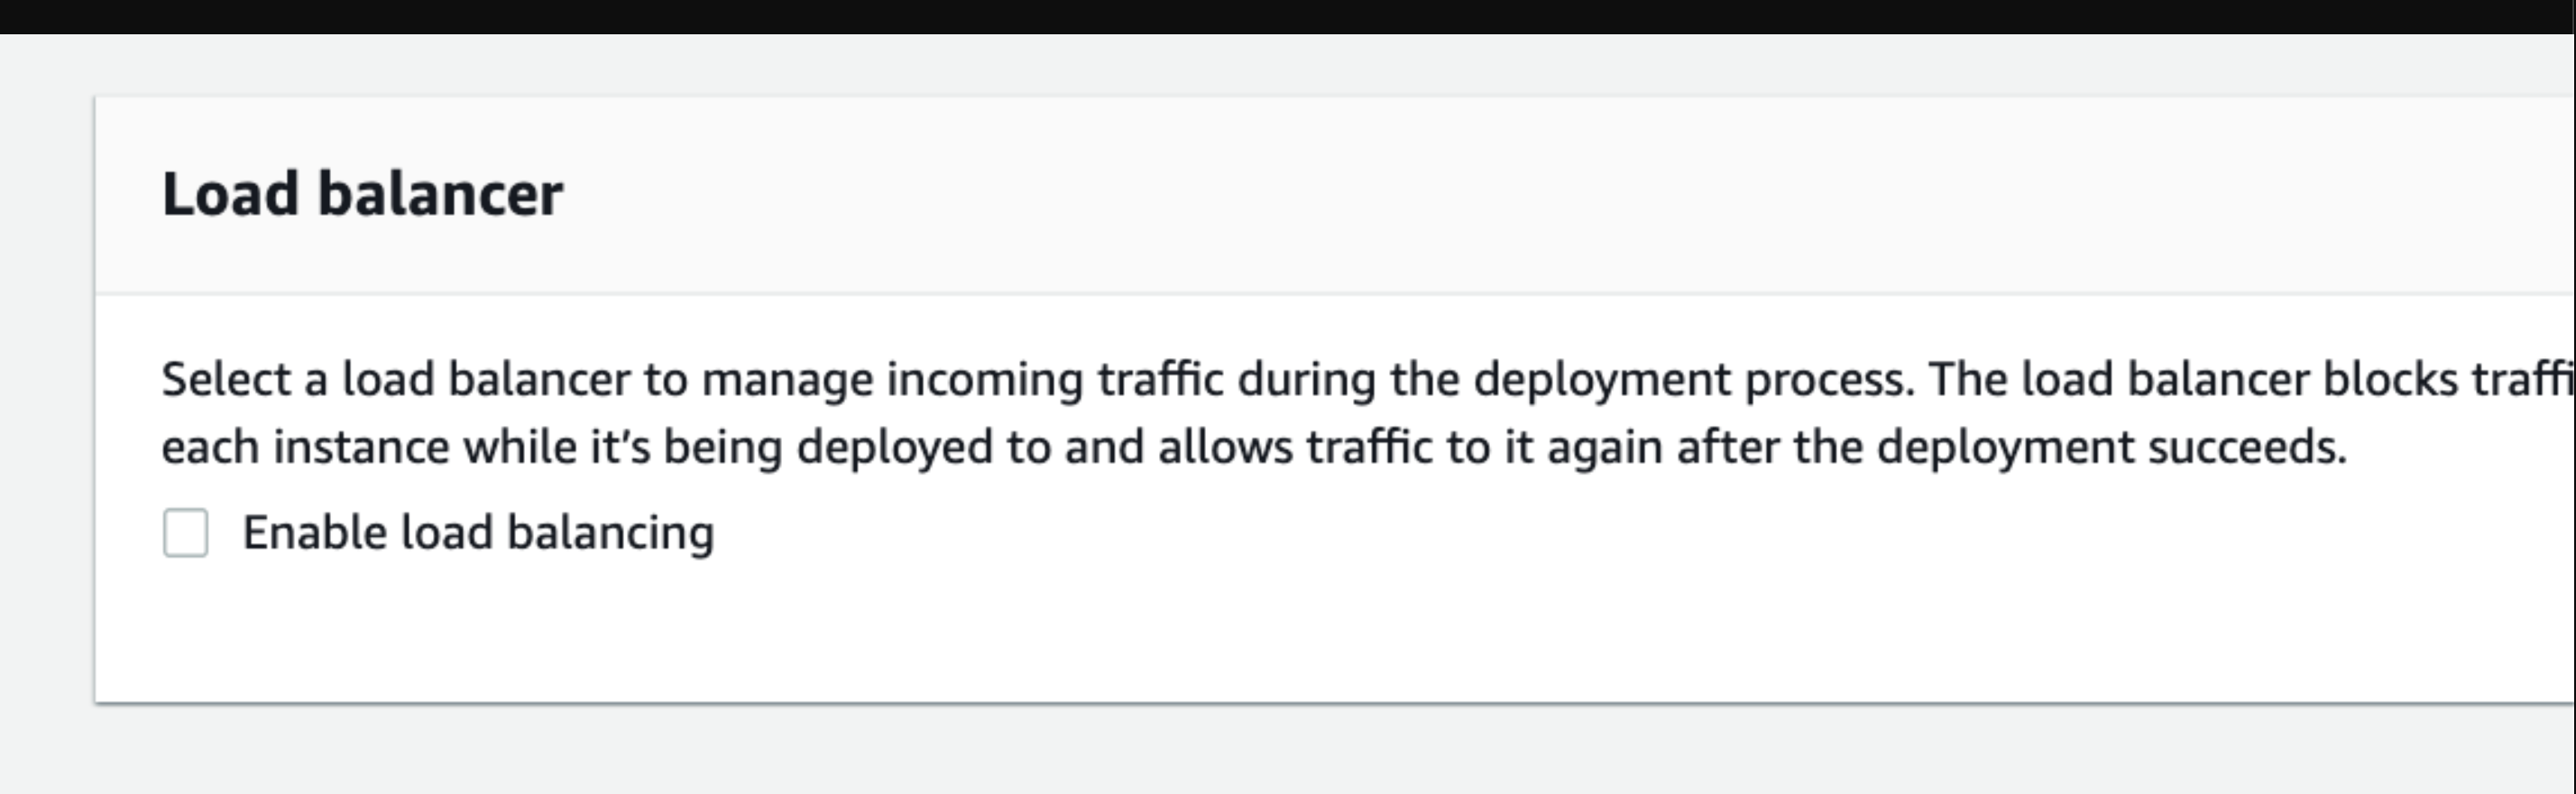
During CodeDeploy deployments, a load balancer stops internet traffic from being forwarded to instances that are either not yet available or are in the process of being deployed. However, the load balancer's precise function is determined by whether it is utilized in an in-place deployment or a blue/green deployment. We won't configure a load balancer for this post; instead, we'll create a deployment group.
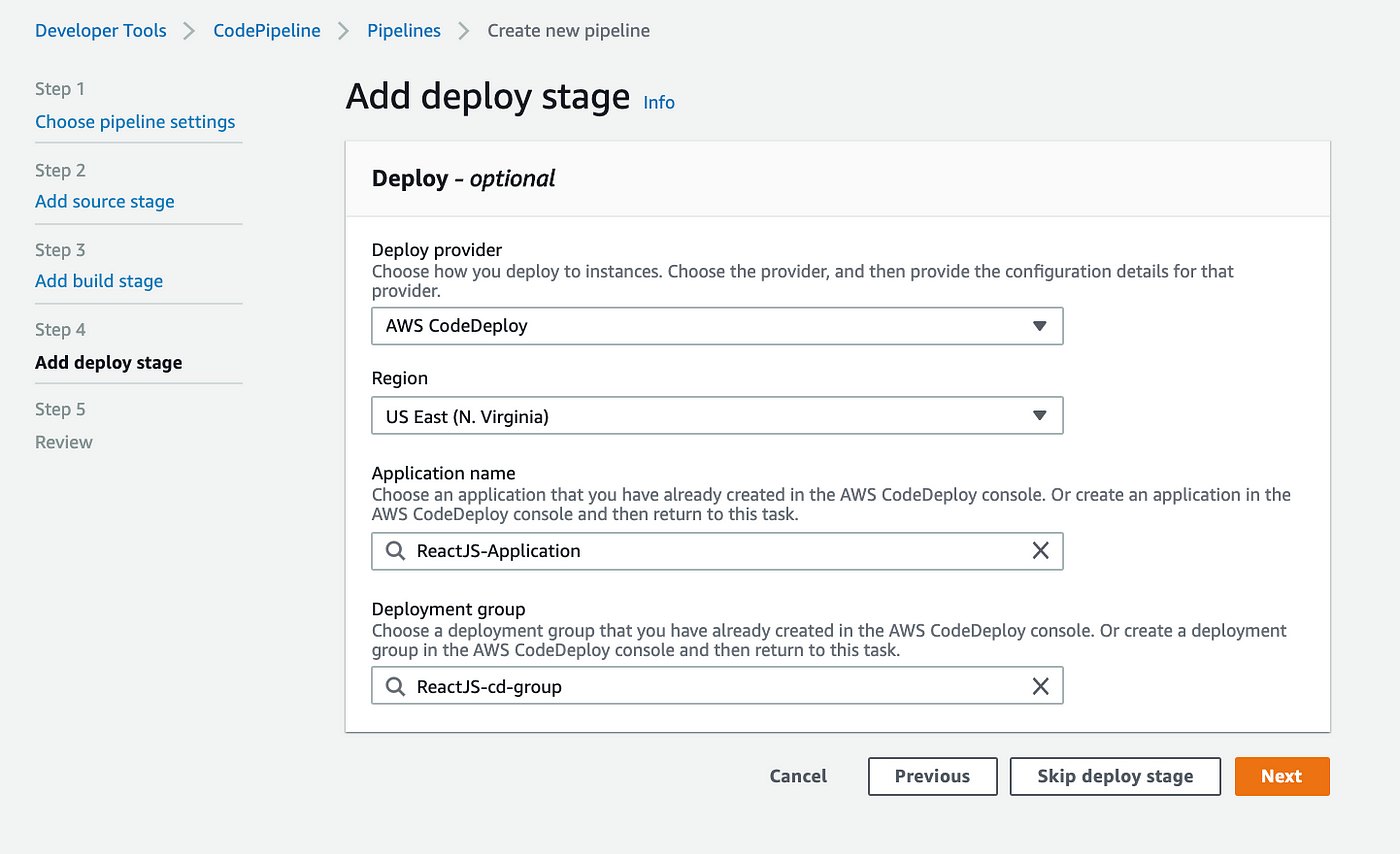
To check our pipeline, let's return to the Add deploy stage browser tab and click Next after selecting the Application name and Deployment group that we just built.
If you don't see the name of your application or the deployment group you just formed, DO NOT reload your browser tab. The textbox for each will delete all of the information you've so far input for your pipeline if you click on it. Instead, click Next to return to the Add deploy stage after returning to the Add build stage by clicking Previous. The Application name and the Deployment group you just made can now be chosen.
We'll briefly talk about the application specification file here. An AppSpec file, which CodeDeploy uses to handle deployment and specify what should be installed on your instances from your application revision in Amazon S3 or GitHub, as well as which lifecycle event hooks to execute in response to deployment lifecycle events, is formatted in YAML or JSON. For further details, see the EC2/On-Premises deployment AppSpec example and the AWS CodeDeploy user guide.
The appspec.yml for my application is as follows:
appspec.yml
# This is an appspec.yml template file for use with an EC2/On-Premises deployment in CodeDeploy.
version: 0.0
os: linux

files:
 - source: /
   destination: /home/ec2-user/server

permissions:
 - object: /
   pattern: "**"
   owner: ec2-user
   group: ec2-user

hooks:

 BeforeInstall:
   - location: scripts/before_install.sh
     timeout: 300
     runas: root

 AfterInstall:
   - location: scripts/after_install.sh
     timeout: 300
     runas: root

 ApplicationStart:
   - location: scripts/app_start.sh
     timeout: 300
     runas: root
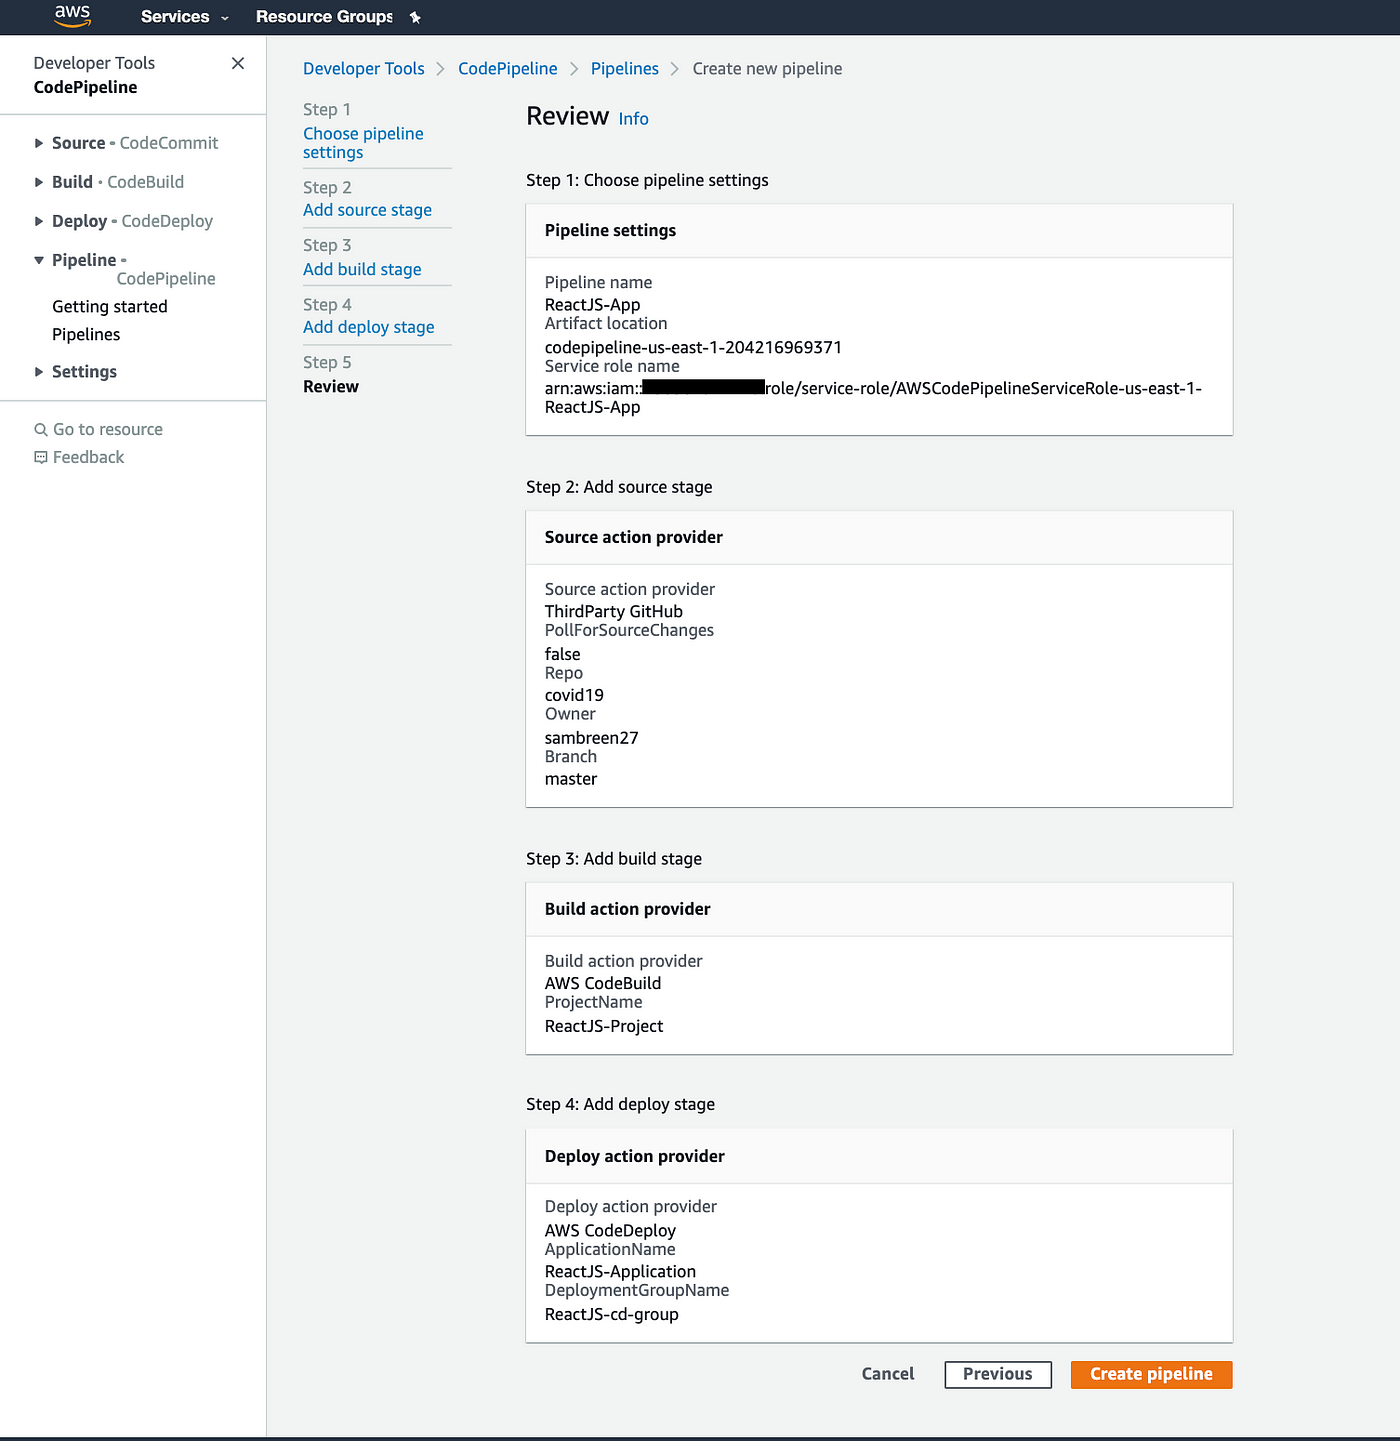
Step 5: Review
After reviewing it, click Create pipeline.
My deployment initially failed!!! ❌
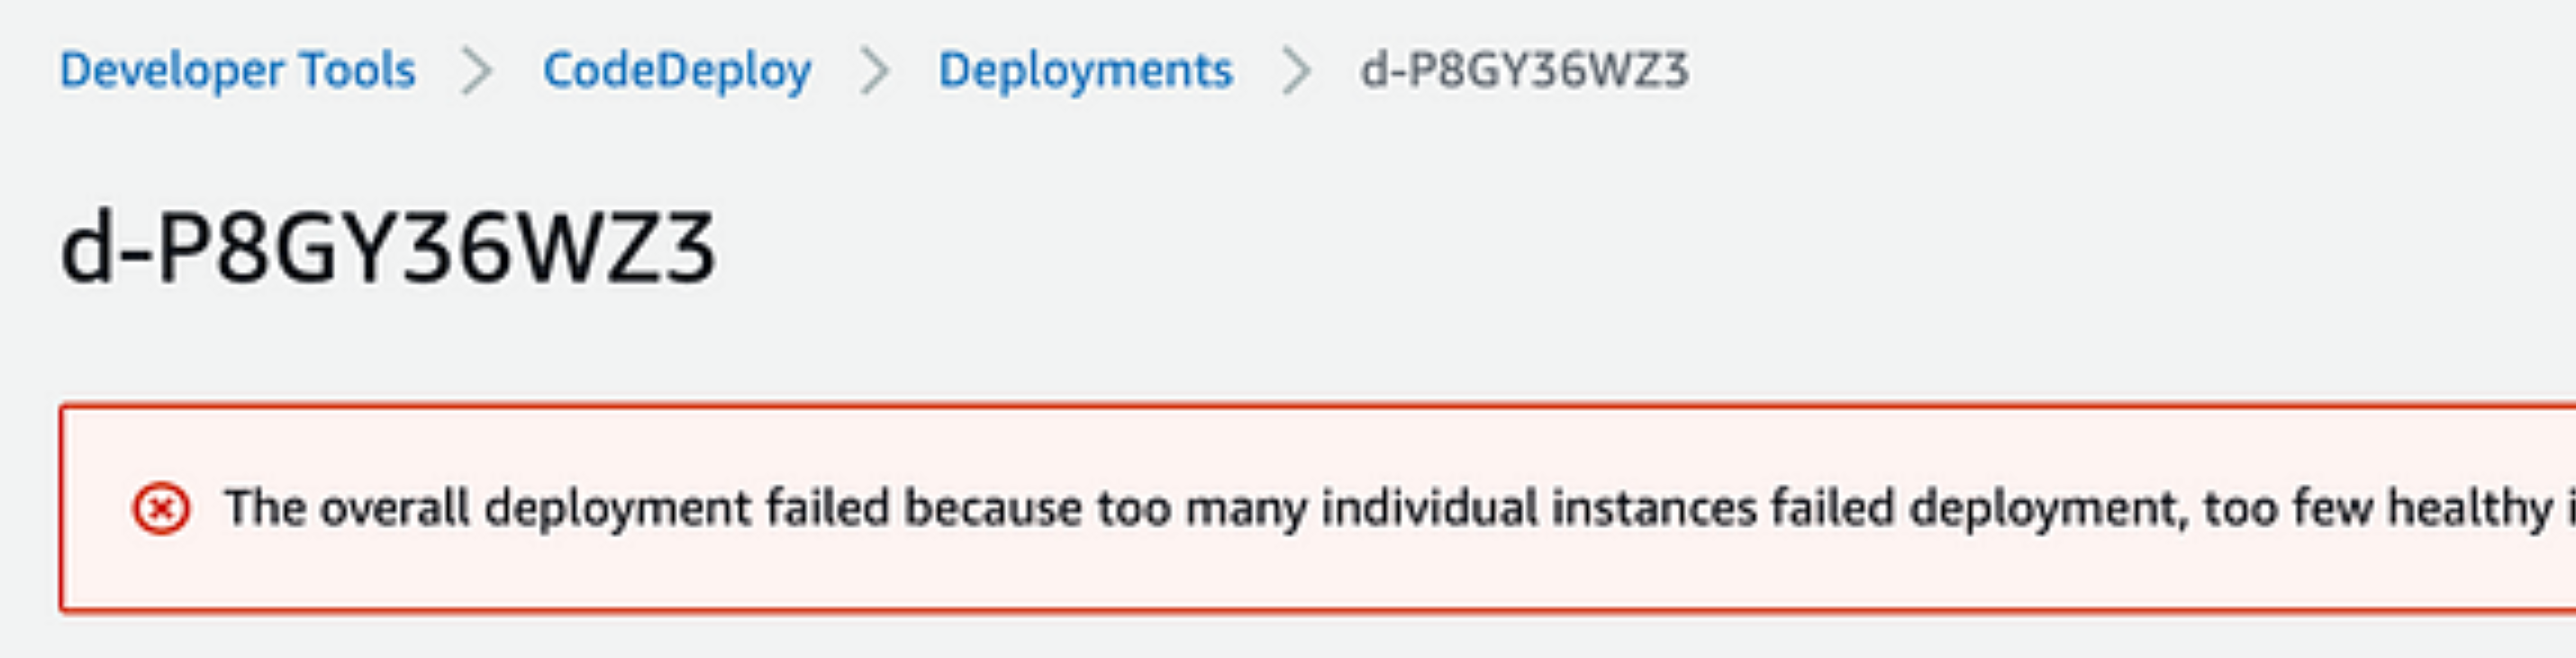
There are various causes for why you can have this problem. Because I hadn't set up the CodeDeploy agent on my EC2 instance, my deployment failed for me. When installed and set up on an instance, the CodeDeploy agent is a software package that enables that instance to be utilized in CodeDeploy deployments. An in-depth post on troubleshooting EC2/On-Premises Deployment Issues may be found here.
Following the instructions in this article, connect to your EC2 instance, and then install or reinstall the CodeDeploy agent on your EC2 instance:update and install Ruby using
sudo yum chmod +x ./install
sudo ./install auto https://aws-codedeploy-us-east-1.s3.amazonaws.com/latest/install
sudo yum install wget
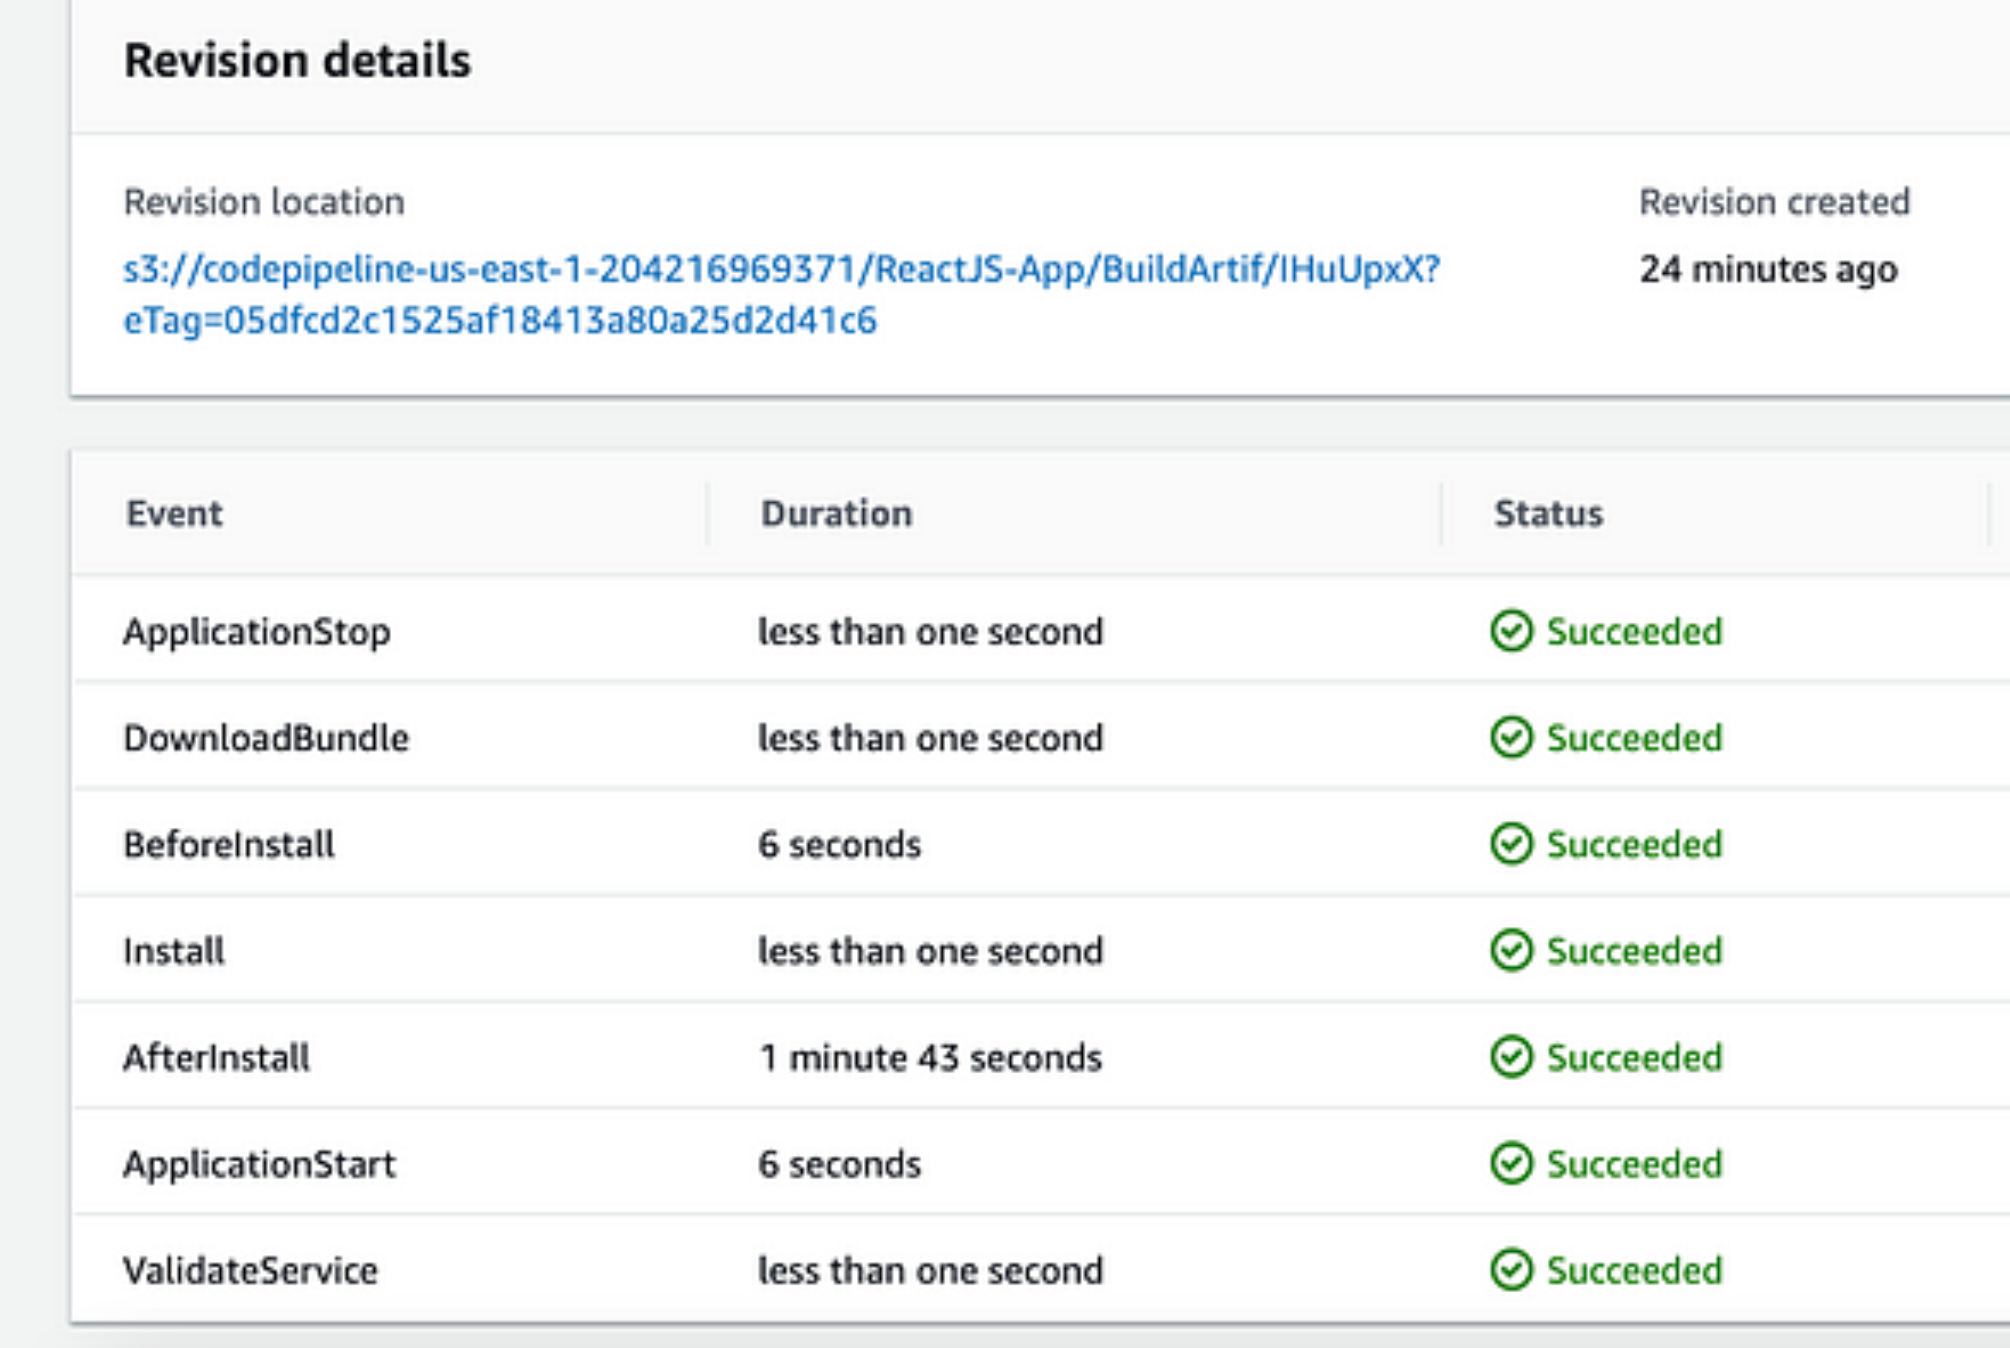
You will see that all six events have the status "succeeded" if everything goes according to plan during your deployment stage:
Several times, my deployment failed, and I lost a lot of time reading the AWS documentation and searching Google for problems and fixes. The best part then emerged:
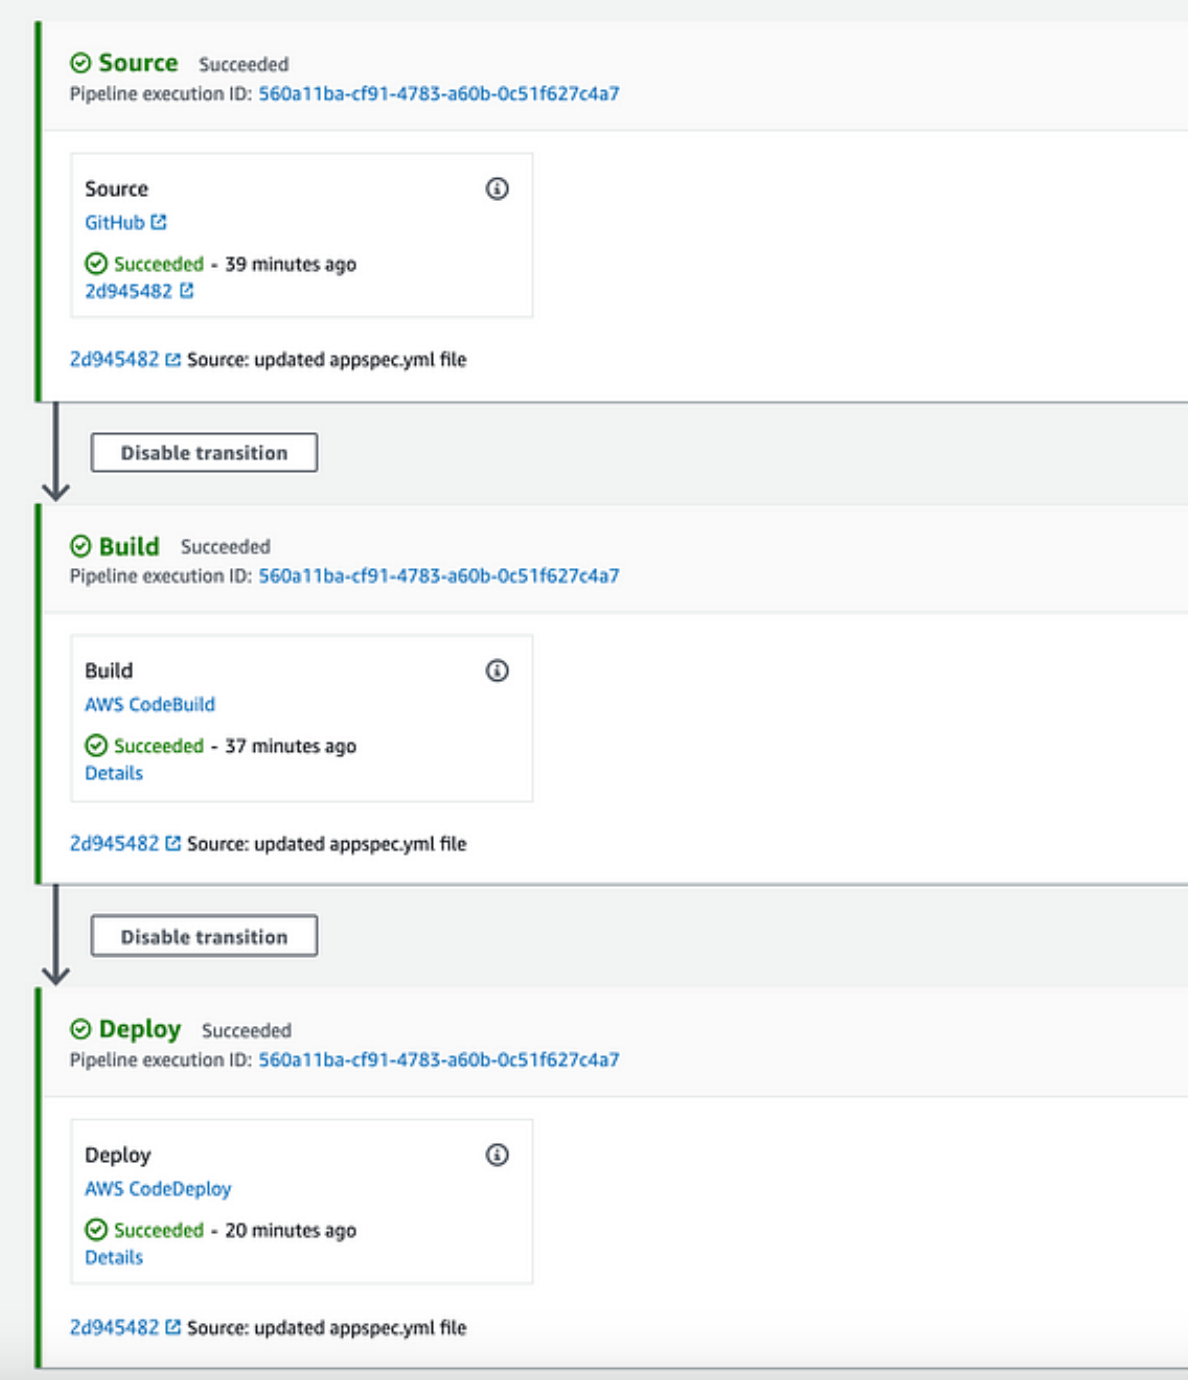
Congratulations! 🎉🎉🎉 Your application was successfully deployed to EC2 using AWS CodePipeline.
5. Access your application on EC2 Public DNS
Your EC2 instance can be accessed through the EC2 Public DNS (IPv4), which can be found in the EC2 Management Console's Description section and looks something like this: ec2-3-81-44-251.compute-1.amazonaws.com. Since our ReactJS app by default uses port 3000, copy/paste your public DNS (IPv4) address into a new tab and add port:3000 at the end. You'll see that this won't work because the browser connection will time out, and nothing will display.
This is because we haven't made port 3000 accessible to the general public. The Security Group can help in this situation. Go to Security Groups on the EC2 Dashboard page, choose your EC2 instance security group (launch-wizard-1, launch-wizard-2, or something similar), and modify the Inbound rules.
You can now access the EC2 Public DNS at a URL similar to ec2-3-81-44-251.compute-1.amazonaws.com:3000 to view the content of your app.
6. Final thoughts
You can host and deploy your web application on AWS in a number of different ways. I selected EC2 so that I could learn about the infrastructure's components, and I selected AWS CodePipeline so that I could learn about the continuous integration and continuous delivery (CI/CD) workflow that enables us to create and manage the process of creating, testing, and deploying applications into a test/production environment using CodeBuild and CodeDeploy.
Thank you for reading!
