Getting started with Vue
I am a software Engineer with 5 years of experience in Frontend development with specialisation in Vue.js, JavaScript, React & Typescript. I enjoy going on tours and meeting new people
Vue (pronounced /vjuː/, like view) is a progressive framework for building user interfaces. Unlike other monolithic frameworks, Vue is designed from the ground up to be incrementally adoptable. The core library is focused on the view layer only, and is easy to pick up and integrate with other libraries or existing projects. On the other hand, Vue is also perfectly capable of powering sophisticated Single-Page Applications when used in combination with modern tooling and supporting libraries.
If you’d like to learn more about Vue before diving in, we created a video walking through the core principles and a sample project
var app = new Vue({
  el: '#app',
  data: {
    message: 'Hello Vue!'
  }
})
this is an article for absolute beginners to VueJS, an open-source JavaScript framework for building user interfaces.
At press time, VueJS is used primarily for web apps (SPAs, PWAs, etc), but VueJS can also be used to target native.
Let’s get started!
Environment Setup
Installing NodeJS
Before you can run a VueJS app locally, you must install NodeJS. NodeJs is a JavaScript runtime environment that executes JS code without a browser.
After installation, (re)start your terminal/CLI interface and type npm -v .
You should see a version number such as:
6.4.1
npm is the Node Package Manager — we will be using it to install project dependencies with commands such as npm install package-name --save and to spin up our VueJS app inside a Node server with commands such as npm run serve and npm start.
Installing vue-cli
Vue-cli is a command line helper for generating and managing VueJS applications.
Let’s install it globally with npm so we can use it from our CLI:
npm install -g @vue/cli
After installation, restart your CLI terminal to ensure it has the latest commands loaded, and check vue-cli works by running:
vue --version
Generating a Project
Let’s create a new project with a router using the vue-cli!
On your CLI, navigate to the directory in which you want to generate your project.
Run the following command:
vue create hello-world
3. Use the arrow keys to highlight default and press enter/return:

Note: Babel is a transpiler that converts our ultra-modern JavaScript syntax to browser-readable JavaScript, HTML, and CSS.
4. Wait for your project to be generated, and cd hello-world.
5. Run npm run serve. Wait for the app to compile, and you should see something like the following:
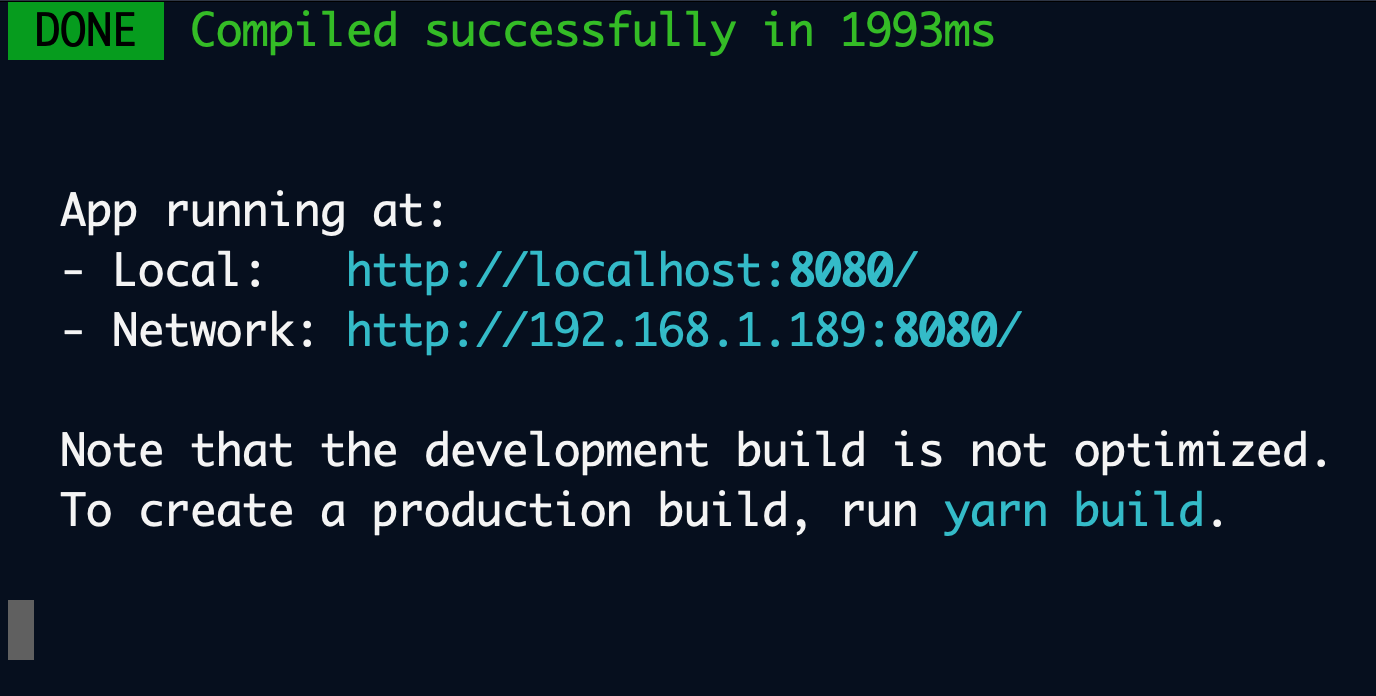
npm run serve starts a development server up that watches our app’s source code for changes. Notice that other people on your network may visit your app using the -Network IP address displayed on your CLI.
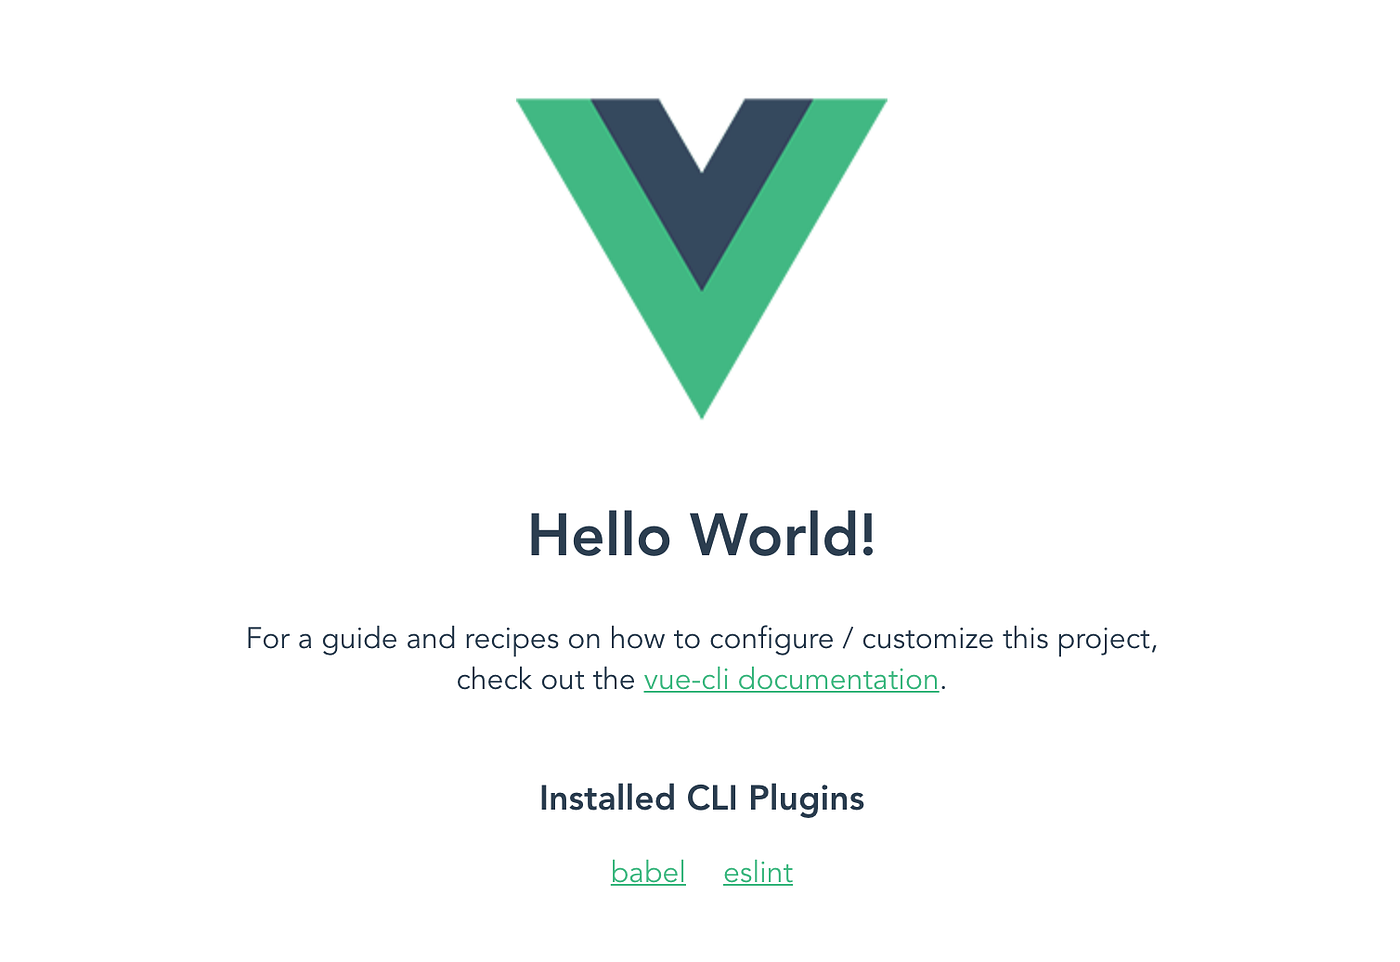
6. Open up your browser and navigate to the URL shown on your terminal, in the above case http://localhost:8080 You should see the following:
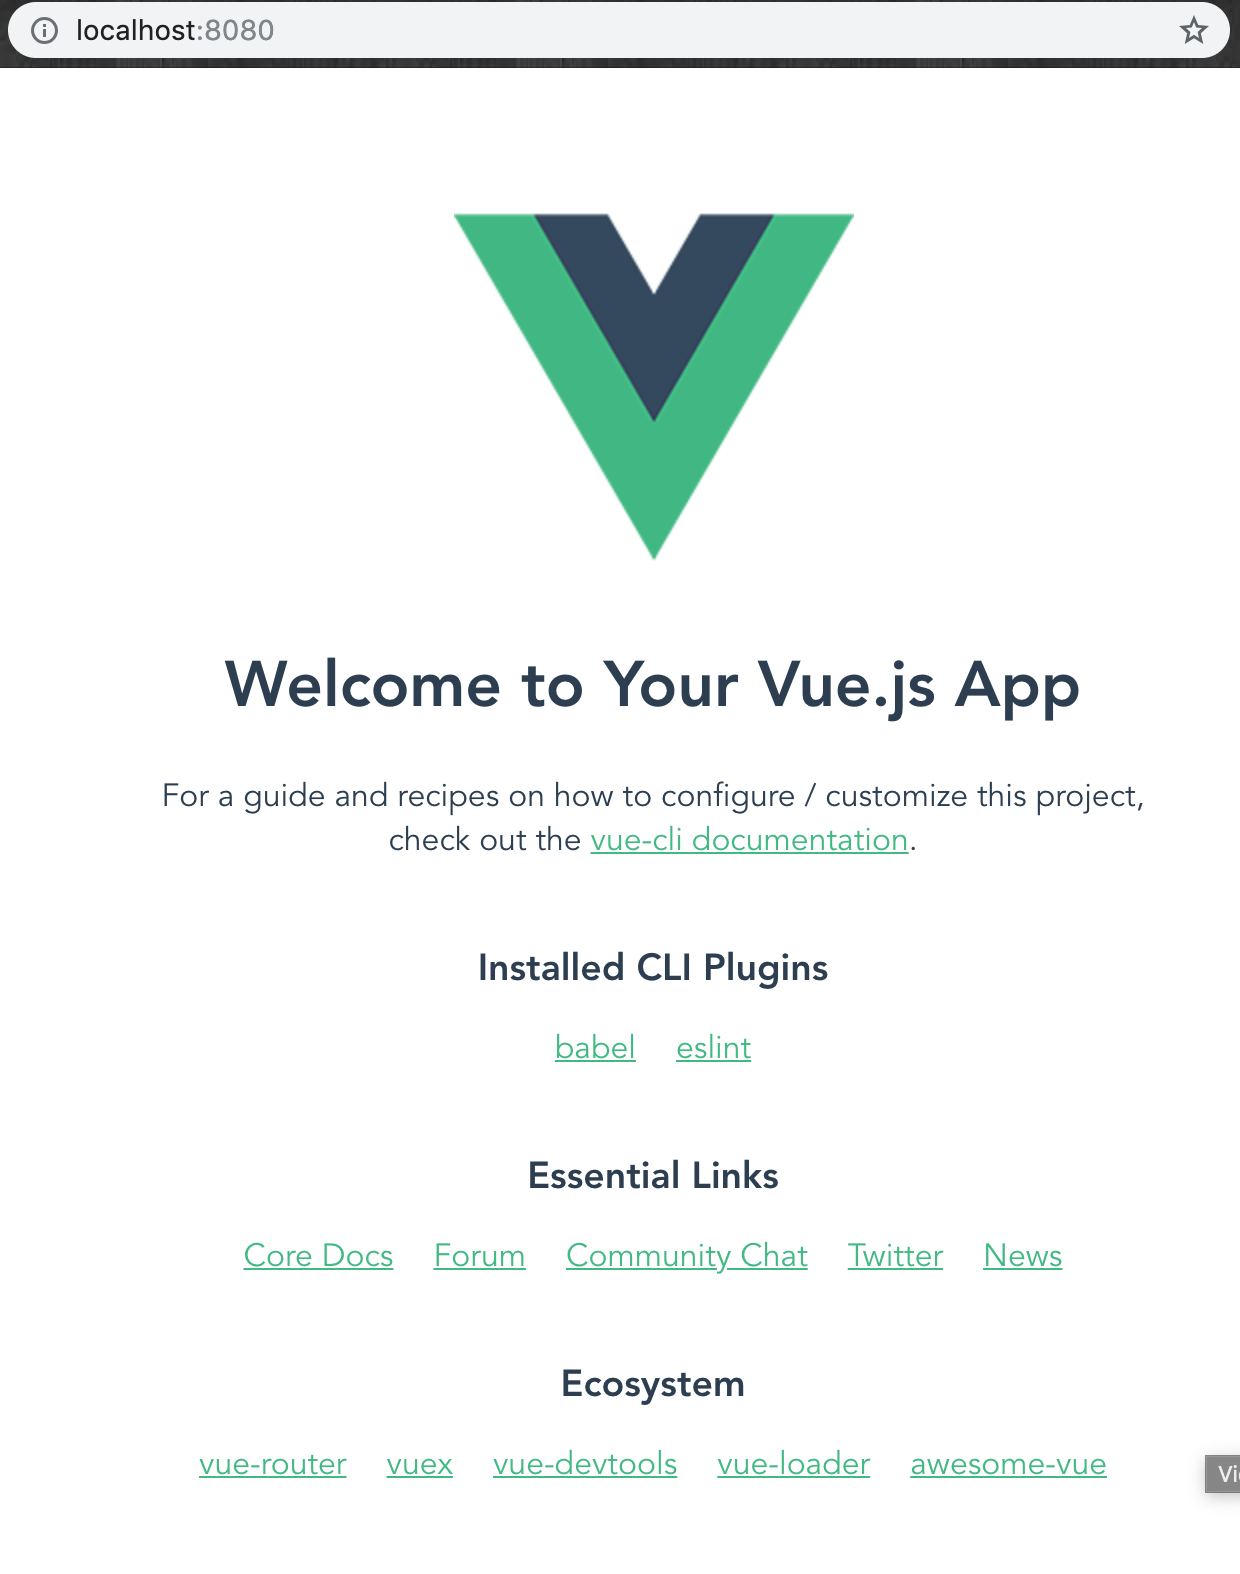
Congratulations! You’re in your first VueJS app!
Our Project Files
Open your project directory your preferred text editor. Let’s take a look at what vue create generated for us with default options:
— package.json
package.json contains a JSON object containing our project’s name, the npm packages installed in our project, the scripts used to run our project (e.g., npm run serve), and other app configuration:
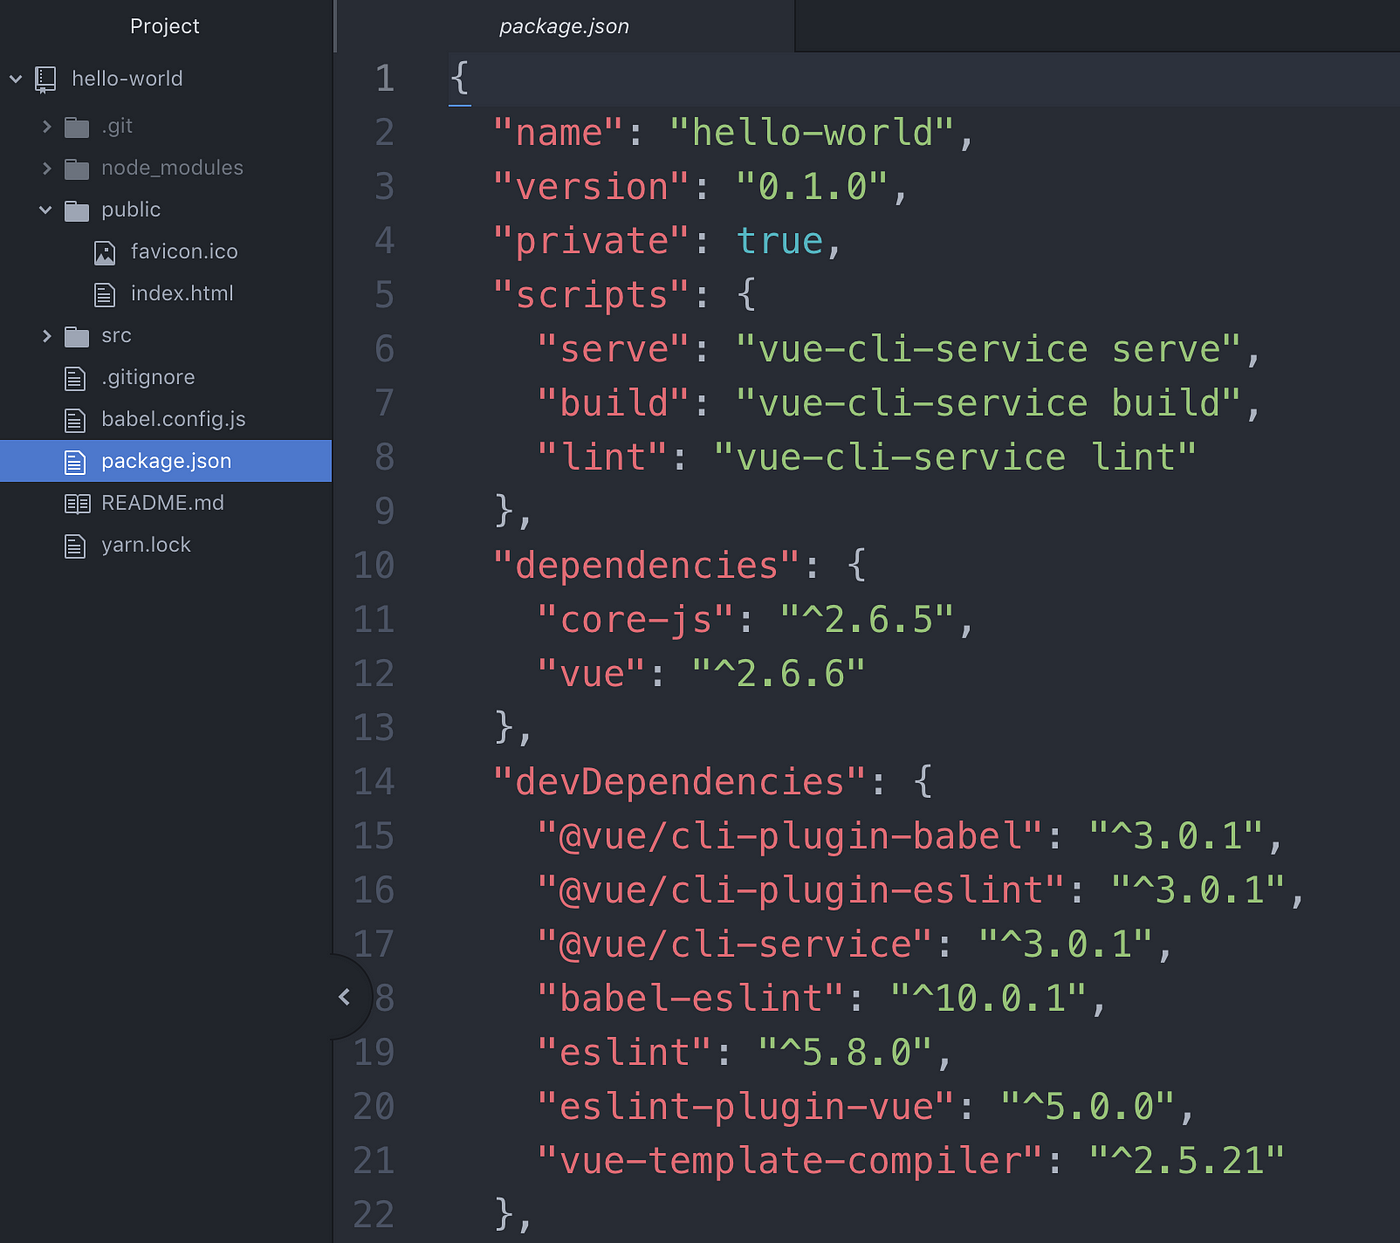
Note re: dependencies: the .gitignored directory in the tree to the left: node_modules ; this directory contains all of the installed dependencies above (or node packages).
When you commit this project to version control (e.g., a git repo), by default this directory is .gitignore‘d, so each time you pull a fresh copy of this project from version control, you must run npm install to install your dependencies declared in package.json.
— public/index.html
Our public/index.html is where our VueJS app renders:

Our JavaScript code targets the <div> with an id of "app" and renders our application there. This is also a targeting method used by ReactJS SPAs, and uses the same HTML tag ID targeting common in plain JS and JQuery.
— src/
Our /src directory is where the magic happens — this is where we write our VueJS code and where we put the assets used in our VueJS code.
— src/main.js
src/main.js is where our root Vue instance is declared and configured:

On line 1 above, import Vue from 'vue’ imports Vue from the 'vue' npm package, which is located in our node_modules/ folder.
Note: This is how we import our Node packages using ES6 JS Syntax. When our code runs in the Node runtime environment, the compiler knows to look in node_modules for modules imported without a directory location (e.g., ./ , @/ , ../ , etc)
On line 2, we import a Vue component named App from ./App.vue . This is our root Vue component, hence the .vue extension.
On lines 6-8, we declare our Vue application. Within our new Vue({}) object, we currently only render our app — within this object, we can also insert vue-router Router configuration, vuex Store modules, vue-apollo Apollo Client modules, and more!
On line 8, we mount our component to #app — this is where we declare <div id="app"> in our public/index.html as the rendering target of our VueJS app.
— src/app.vue
src/app.vue contains our root Vue component. Like all Vue components, this component is comprised of three sections contained in tags:
The
<template>...</template>tag that contains our component’s HTMLThe
<script>...</script>tag that contains our component’s JavaScript and our component’s Vue instance information (withinexport default{})The optional
<style>...</style>tags that contain our component-specific CSS.
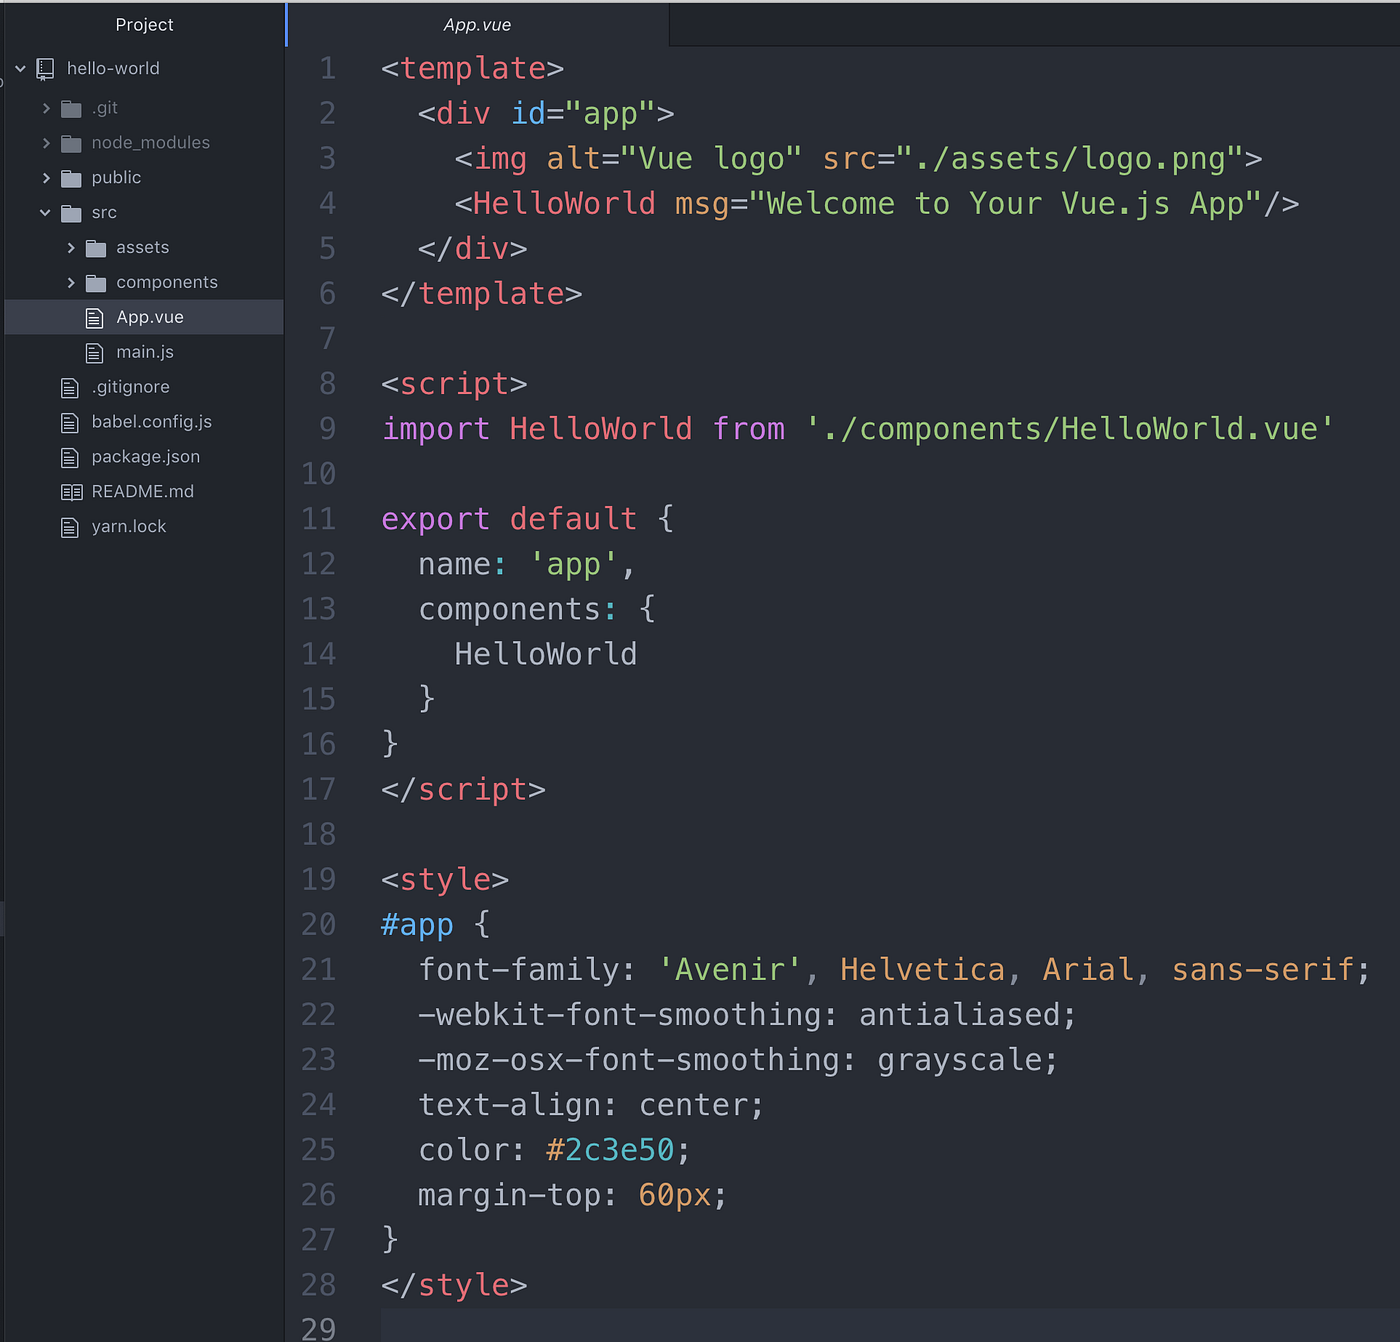
Within our <script> tags, we import the HelloWorld Vue component from ./components/HelloWorld.vue, and we configure our Vue instance object, within our export default {} object:
export default {
  name: 'app',
  components: {
    HelloWorld
  }
}
We have to declare our imported HelloWorld component in the components: {} object of this component’s Vue instance, otherwise trying to put it inside its HTML <template></template> tags would throw an error and cause our app to fail.
Within the <style></style> tags here, we have CSS styles that will be applied to this component and any child component of this component, such as the HelloWorld component.
— src/components/
Our src/components/ folder is where we put Vue components that may be used across one or many of our web app’s views, or pages.
— src/components/HelloWorld.vue
The HelloWorld component lives in the components directory, and contains the aforementioned <template> , <script> , and <style> tags that define the component’s HTML, JavaScript, and CSS, respectively.
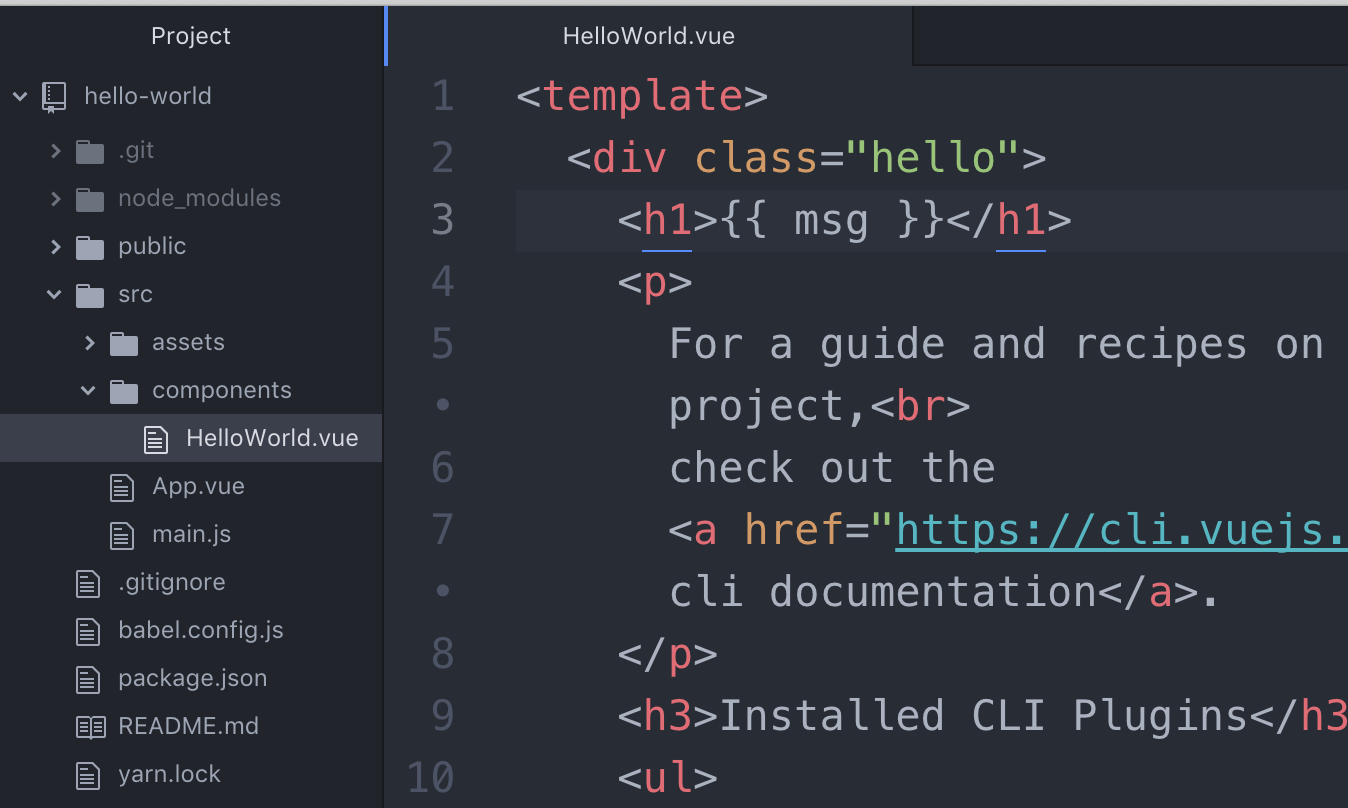
Props
On Line 3 of HelloWorld.vue, you’ll notice curly brace template syntax containing the component’s msg property key.
In VueJS, curly braces are used for interpolation of values from the component’s data() object, props, and other properties of our Vue instance.
The msg property key here is a prop, a value that can be passed into <HelloWorld /> from a parent component containing it. This prop is declared on Line 37 of HelloWorld.vue, in our component’s props object:
export default {
  name: 'HelloWorld',
  props: {
    msg: String
  }
}
In this case, HelloWorld’s props comprises a typed object; we can see that msg is supposed to be a String, not an Object, Integer, or Function.
An alternative way to declare component props is in a dynamic (typeless) array:
export default {
  name: 'HelloWorld',
  props: ['msg']
}
In our generated app, a string is passed through the msg="” prop of the <HelloWorld /> component on Line 4 of src/App.vue:
<HelloWorld msg="Welcome to Your Vue.js App"/>
Now, let’s change this string to a reactive data property!
Reactive Vue Data Properties
Right now, our App.vue component declaration consists of:
export default {
  name: 'app',
  components: {
    HelloWorld
  }
}
At the moment, the component in App.vue has a name and imported component declarations.
Let’s add data(){} to this component below our components:{} declaration:
// template code omitted
</template>

<script>
import HelloWorld from './components/HelloWorld.vue'
export default {
  name: 'app',
  components: {
    HelloWorld
  },
  data(){
    return {
      message: 'Hello World!'
    }
  }
}
</script>
When our Vue app runs, it adds all of the properties found in this data object to Vue’s reactivity system, meaning that when properties of this data object change, Vue reacts to and digests the changes.
As you can see, the data object is declared as a function, data(), that returns an object {}.
Within the object above, we are returning a message property key with the string value of ‘Hello World!’.
Let’s pass this data property through our <HelloWorld /> component as a prop!
Passing Component Data as Props
Right now, <HelloWorld /> is accepting a string value through msg="" . We want to pass our component’s message property through msg sort of like a variable.
If we try msg="message", our component will render a “message” string, not our variable.
In order to pass a property of our parent component through this child component, let’s a data-binding colon (:) to the prop of that component declaration:
<HelloWorld :msg="message" />
Note: :msg is shorthand for v-bind:msg , which binds the msg prop to our component’s data. We can also run certain JavaScript inside properties and attributes with the :, such as ternary statements and functions.
App.vue should now look like this:
<template>
  <div id="app">
    <img alt="Vue logo" src="./assets/logo.png">
    <HelloWorld :msg="message"/>
  </div>
</template>

<script>
import HelloWorld from './components/HelloWorld.vue'
export default {
  name: 'app',
  components: {
    HelloWorld
  },
  data(){
    return {
      message: 'Hello World!'
    }
  }
}
</script>

// styles omitted
Great! Now, let’s make our message interactive with v-model 😎
Manipulating Component Data with v-model
Add a text <input/> tag on Line 5 of App.vue under <HelloWorld />:
<HelloWorld :msg="message" />
<input type="text" />
Now, in order to edit our message data property with this text input, add v-model="message" to it:
<input type="text" v-model="message" />
Our <template> section should now look like this:
<template>
  <div id="app">
    <img alt="Vue logo" src="./assets/logo.png">
    <HelloWorld :msg="message"/>
    <input type="text" v-model="message" />
  </div>
</template>
Let’s run our app again and edit the text in our text input to see this reactive data in action:
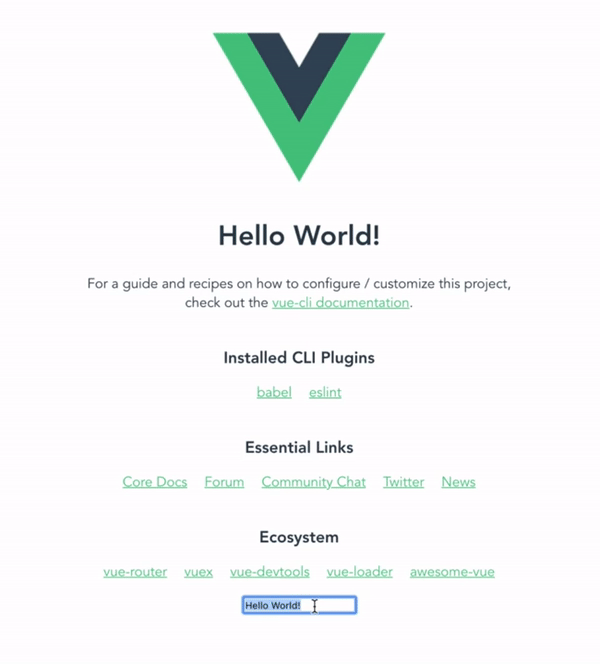
Nice!
Methods
To complete our introduction to VueJS, let’s add a method that does something with the value of our text input field.
A component’s methods are added to the methods: {} object of a Vue component, which is registered to our Vue component similarly to how we register data(){} and components:{} .
Let’s add methods:{} to App.vue:
<script>
import HelloWorld from './components/HelloWorld.vue'
export default {
  name: 'app',
  components: {
    HelloWorld
  },
  data(){
    return {
      message: 'Hello World!'
    }
  },
  methods: {
    // method functions go here
  }
}
</script>
Now, let’s add a function called alertMessage() to our methods that creates an alert containing message:
In JavaScript, this. refers to the object that the function, method, or class belongs to.
Side note: The only instances in which this. does not refer to the owner, global, or referred object is when it is called in a function in strict mode (where it is undefined), or within an event, in which case this. refers to the element that receives said event.
Now, we have our alertMessage() function above — but no way to call it!
Calling Methods with Click Events
Let’s add a button to App.vue that calls our alertMessage method on-click on the line under our <input />:
<button @click="alertMessage">Alert</button>
Just as :msg="message" is shorthand for v-bind:msg="message", @click="alertMessage" is shorthand for v-on:click="alertMessage".
Our <template> should now look like this:
<template>
  <div id="app">
    <img alt="Vue logo" src="./assets/logo.png">
    <HelloWorld :msg="message"/>
    <input type="text" v-model="message" />
    <button @click="alertMessage">Alert</button>
  </div>
</template>
Let’s run our app and see it in action:
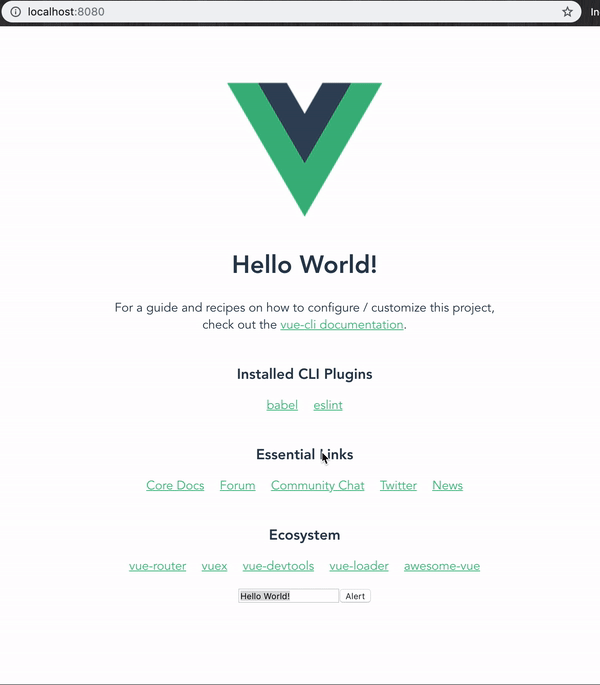
Great!
You can imagine that in a typical web app, we could have an onSubmit function within our component methods that could POST form contents to a backend or filter an array of data.
Epilogue
In this article, we established our Node/vue-cli development environment, took a look at standard Vue web app directory structure, explored parent / child component relationships, and learned about props, data(), v-model, methods, and click events.

